Thursday, May 22, 2014

Backsplash Design assistance

Backsplash Design

My husband, sweet man that he is, has no ability to visualize.  I toted him around like a handbag to tile store after tile store, and as his eyes glazed over, it was soon obvious that he had no ability whatsoever in visualizing what I was trying to create for our new kitchen backsplash design.  Fortunately, the wonderful people at my favorite tile store ARE able to visualize, and they helped assist me in finding just the right tiles for my design.

So, creative and computer savvy person that I am, I went home, zapped pictures of tile off the internet and off my cell phone, and "drew" up the design plans using my handy dandy computer, so that my sweet hubby could "see" what I wanted to do.  I even "drew" in pictures of the outlets so he could envision what those would look like as well.

My original design included six in squares of marble on point with 1x1 oil rubbed bronze (ORB) tiles in between to create a "quilted" look. Then, periodically, a few 2x2 oil rubbed bronze floral tiles and a few 2x2 copper "scudo" tiles to pop.  The tile goes COMPLETELY up the wall from the counter to the bottom of the cherry cabinets.  The oil rubbed bronze rope at the bottom will abut the granite counter (which I pictured here as well for effect).  The oil rubbed bronze rope on top only appears in a few sections of my kitchen where there is no cabinet above, and to finish off the vertical ends.  For example, the tile will end where the cabinets stop at the end of the counter next to the fridge.  I will have the ORB rope in a vertical line from the bottom of the cabinet to the edge of the counter, as an "end" to the tile, leaving the area behind the fridge to simply be painted, not tiled.

Now I need some help choosing which of the three patterns (below) to use as my design.  They are all three nearly identical, with the center row being the only thing that changes.  

DESIGN A

In this example, I have 3 separate 2x2 designs in the center row.  
The copper "scudo," then a simple ORB puffed square, then a copper scudo, then an ORB fleur.  


DESIGN B
This example is much simpler, with every other middle square being a 1x1 the same as above and below, with a 2x2 scudo and a 2x2 fleur ORB every other one.


DESIGN C
 This last design has every other one a Copper scudo then an ORB fleur, with NO ORB puffed squares at all.


Lastly, here is the design for the "rug," or decorated area behind my stove.  It will take up most of the area behind the stove up to the venting hood.  Looks spiffy, eh?


So, which backsplash pattern do you like the best?

* * * * *


Wednesday, May 21, 2014

Kitchen remodel - Day 1

Kitchen Remodel 
Day 1

So at long last, our kitchen remodel has begun.  For those of you who haven't been following along, here's what you missed:

Our new dishwasher leaked, ruined the hardwood floors, and destroyed the integrity of our kitchen cabinets.  Sigh.  Our homeowner's insurance is helping us to foot the bill, and we've started the process of gutting the kitchen and starting again.

Day 1:  Demolition

Destroying our kitchen was a dramatic affair.  In one short day we went from all to nothing.  We've been planning the renovation for a few months.  After the leak, we went through a long and tedious process of finding (and firing) a contractor, working with the insurance company, picking out exactly what we want for our new kitchen, and prepping the rest of the downstairs for the changes.

This is an old picture, but gives you a pretty good idea of what we started out with:


(Sidebar:  It's funny to me to see this picture now:  I painted the WHOLE kitchen yellow.  In the pictures below, when the cupboards are removed, you can see that I really painted VERY little of the kitchen yellow.) 


The night before demolition, we removed all the contents of our kitchen cupboards, and moved everything into our mini studio apartment in what was formerly known as the office.  See the following two blog entries for more details:  Preparing for the remodel (part 1) and Preparing for the remodel (part 2)

The next morning, the guys came in and demolition begin.  First, they removed the cabinets:

 See how VERY little of the kitchen is actually painted yellow?  Cracks me up.


Next they removed the soffit, the lowered ceiling.  The only problem was, they weren't expecting the ceiling to be filled with extra insulation.  Look ma, it snowed pink!


Then with a bit of clean up and some plastic wrap to create our Dexter Kill Room, er, I mean, our plastic wrapped off studio apartment, they were done with Day 1.


From inside our hermetically sealed studio

From here on out, the changes will be less and less dramatic.  But we're making progress!! Yay us!!


* * * *

Preparing for the renovations (part 2)

House Renovations
Preparation!

Preparing for the Renovations (Part 2)


As we get ready for our house renovations, we read articles on what to do to make the best out of the difficult situation of living inside a house during a major remodel.  Basically, we were going to be  living without a kitchen, laundry room, and powder room for at least eight weeks.  WOW.

Many people suggested that living without a kitchen works best if you can set up a temporary kitchenette so that you can continue to make coffee, breakfast, and light meals during the renovations.  

I agreed with these folks, and we set about making this temporary kitchenette a reality.

After moving all our downstairs furniture and decorations to the garage (see Preparing for the renovations part 1), we set up a mini studio apartment in our room, formerly known as the office.  Inside, we placed our couch, 2 chairs, the tv, some side tables and lamps, a large desk to be used as the kitchen table, and two large bookshelves to store the pantry items.  We also set up a table to be used as a desk for homework, printing, bills, etc.

It looks like this now:


We brought in the coffee pot and toaster oven, microwave, and had the workers bring the fridge in here too.  Unfortunately, after running the microwave AND the fridge on the same unprepared circuit,  I blew the entire fuse system out in the house, and had to flip all the circuit breakers back.  I then moved the microwave to the laundry room, and things worked much smoother.  We also have the pancake skillet, and, although slow, seems to work great for heating up sausages and grilling sandwiches as well as pancake making!
 
We're using the utility room sink for now as our water source and to wash our dishes.  I bought a small plastic tub for washing dishes and a small dish drainer and set those up in the laundry room as well.

So far we've been able to eat all of our breakfasts here at home except on the weekends (when hubby prefers a big, hot breakfast), and the kids have been able to pack their lunches for school.  It's not been great for the environment switching over to paper plates and plastic forks for the next few weeks, but we're recycling everything we can and reusing whenever possible, and that helps.

Things will change next week when they pull everything out of the laundry room and they remove the toilet from the powder room making them both unusable until after the new hardwood floors get installed.  But hopefully we'll only be without for three or four days.  We'll have to head upstairs for water.  But honestly, it feels like luxury camping!  Every time I come in here, I feel a bit like I'm living in Hermione and Harry's magical, extendible tent from when they go watch the Quidditch World Cup in Book 4!

* * * * *

Preparing for the Renovations - Part 1

Preparing for the Renovations
Part 1

As soon as we realized that we were going to be going through a major kitchen remodel, we decided to make some changes to the rest of our downstairs before the construction work began.  

At this point, we knew that we were going to have to replace all the hardwood floors and the entire kitchen was going to get gutted.  If we were getting new hardwoods, we figured we had better buy new carpets throughout the house, as these are 20 some odd years old, and have the stains and wear and tear to show for it.

And as long as we were going to replace all the flooring, it made sense to paint all the walls and all the ceilings before the new flooring was installed.

And before the painting could begin, it made sense to sand all the pocket doors and stain them.  And before all the pocket doors were sanded and stained, I needed to sand and paint all the trim around all the windows, doors, and baseboards.  Then it also made sense to refinish the laundry room cabinets.  I mean, after all, if I didn't have to worry about dripping and spilling, now was most certainly the best time.

So I took my time, plotted and planned everything out and set to work.  I'll update this page with links to the projects as I get them up on the blog.

First:  We gutted the house of all furniture, decorations, wall hangings, and everything else that we could remove.  A traumatic experience, indeed.  We put just about everything into our garage -- which soon took on the feel of a hoarder's nest.  I fully intend to live a more minimalistic lifestyle when this renovation is complete.  Nothing is coming back into this house unless it HAS to.  All else I'll sell at a major garage sale later this summer.  Everything must go!!  It's amazing how much stuff a family can accumulate over a period of a few years.  I have been loving living more simply during this renovation process, and hope to reduce the amount of excess stuff we have over the next few years.

Next:  I tried (and failed) to remove the baseboard trim so that I could sand it and repaint it.  Unfortunately the lovely owners before us reinstalled the baseboards with ginormous four inch nails that, after strenuous effort and several close calls to serious bodily harm, eventually detached -- leaving gaping holes in what SHOULD have been plaster or dry wall, but really was a paper thin coating of "wall," barely thicker than a coat of paint.  Sigh.  Then the boards themselves chipped and broke on the ends because the reinstallers decided to use upwards of eighteen or nineteen nails at a time per end of the board to slam those suckers into the wall.  Sometimes straight into the metal wall support.  Ugh.  At this point I quit.  I called the contractor and had him add new baseboard install, paint, and caulking to the job bid.  Sigh.

Third:  I took advantage of the empty rooms, and sanded and painted the wood baseboard trim in place.  (No more taking it off!  No more holes in walls!).  After I sanded and painted the trim, I realized there was no reason to buy the same short, minimal baseboards to replace the ones in the hallway.  I could replace them with beautiful, bold, bigger baseboards.  And if I was going to replace the ones in the hall, I'd have to replace the ones in the shared living room.  And if I was going to replace those, it made sense to replace the ones in my office as well.  So that was a futile waste of a day sanding and painting the office baseboards.  Lesson learned though.  I didn't do a darned thing to the baseboards in the living room.  I'm just leaving them to be professionally removed and replaced.  Sigh.

Fourth:  I painted the ceilings and walls in the office.  Easy peesy.

Fourth:  I moved our couch, chairs, and a few end tables into our room formerly known as the office to set up what would become our studio apartment w/ kitchenette.

Fifth:  I sanded and stained each of the three pocket doors.  I hope I took before pictures, because these transformations were truly amazing.  At least I can show you some after shots.  I also replaced all the hardware with oil rubbed bronze.

Sixth:  I sanded and painted all of the window and door trims in the hall, kitchen, and dining room.

Seventh:  I sanded, stained and sealed the laundry room cupboards.  For the before/after shots, see this link:  Laundry Room Before/After.

Eighth:  Then I sanded, stained and sealed all the laundry room cupboard doors.  I took this opportunity to sand, stain, and seal the laundry room door, and the hall closet louvered door as well.

Ninth:  I sanded, stained, and sealed the doorbell box.  For the before/after project, see this link:  Ding Dong Ditch It.

Tenth:  I sanded, stained, and sealed the staircase railings.  For the before/after project, see this link:  Stair Transformation.

Last:  I painted the ceiling and the walls in the living room.

Whew!!!  Now we're ready for the renovations!!!

* * * * *
Updating the stairs

My next project involved updating the stairs.  And what a difference the changes made!!


To me, this transformation was one of my favorites.  I have hated the orange wood in my house since the day we moved in.  And systematically removing all the orange has been very therapeutic, albeit time consuming!!

But this project served a dual purpose.  When we went on vacation, one of my kitties decided to use my newel post as a scratching post.  URGH!!!  The results were disastrous.  


Seriously?!?  Bad kitty.  Bad, bad kitty.

After my usual ritual of sanding, I had to spend considerable amounts of time sanding and sanding and sanding and sanding and sanding the newel post to rid the post of all kitty scratches.  I knew that the results would leave the newel post considerably warped, but my other alternative was less than desirable.  I had one of my contractors come and give me a bid to help me fix the problem, and he said I basically needed a new newel post.  Then he said if he took the newel post off, he'd have to replace all of the balusters.  Because, he informed me, my current balusters are 4 ¼ inches apart.  And current code states that all newly built staircases must have balusters no more than 4 inches apart.  Then, he said, he'd have to replace the newel post at the top as well to match the one on the bottom.  Then he'd need a new hand rail, and a new set of trim.  His bid came in at over $1,800 whopping dollars!!!  Um, no.  I don't THINK so.  So as much as I despise the orange wood, and as much as I abhor the kitty damage.  And as much as I dislike the round knobs on the top and REALLY want an upgrade to a different type of newel post, I was NOT willing to fork over $1,800 for what would amount to a few hours' work over the course of a few days.  Um, no.

So I sanded and sanded and sanded, and I made a doozy of a warped newel post.  BUT, once I stained the post, the warping was much less noticeable and very livable, considering the $1,800 alternative.  I mean, really, do you know how much chocolate I can buy with $1,800?!?  Or clothes?  Or a vacation?!?  Geesh.  Since I already had the sander, the stain, and the sealant, it cost me a whopping $5.47 for sand paper to make this dramatic change.  In the next 4 pictures, you can see the warping.


I did have a problem with the stain job on the stairs. Evidently the real wood on the stair railings was not the same type of wood on the cabinet doors from the laundry room.  So my mahogany stain which I liberally slathered all over the freshly sanded wood, came on REALLY dark REALLY fast.  Normally it comes on almost like an English Chestnut, a rather medium brown with some reddish hues.  As I add the next two coats, it darkens into a beautiful, stunning mahogany.  I wasn't even thinking that the colors would be different on the stairs.  Sigh.  So, to remedy the situation, I bought a small can of insanely red sedona stain, and slathered that on.  The nearly black wood changed slightly with the first coat, and by the time the second coat of red stain had been applied, I was tickled pink with the results.  I'm so relieved I didn't have to go back and start over, sanding the entire thing once again, and reapplying new stain color.  I did learn my lesson, however.  So when I sanded and stained the hallway louvered door later that week, I made sure to stain a 'test' strip on the back of the door.  When I discovered the same black stain result, I switched the rest of my first coat to red chestnut.  Then my second coat I used the red mahogany, and I was thrilled with the results.  I'll show you the before/after pictures of the hall closet door in another blog.

So, back to my staircase.  Just think of how great it's going to look with my lovely, new hardwood floors, my fabulous 4 inch white baseboard trim, and my newly carpeted stairs!  I'm so excited to see what it's going to look like!!

All in all, I was very pleased with my project.  Now, let's go shopping with my $1,794.53 savings!!!


 * * * * *


Saturday, May 3, 2014

Ding Dong Ditch It

Hello all!  Our house renovations have taken over our lives!!!

As many of you know, we are currently undergoing a massive house renovation, as our dishwasher decided to piddle underneath our kitchen floors, ruining the floors, and my cabinets, and hence my kitchen counters as well.

So while we have been waiting for a VERY long time for everything to work itself out regarding contractors, and our insurance company, and choosing tile and counters and cabinets and designing a backsplash and picking out floors, and choosing carpets and supplies being ordered, and so forth, I have been madly working around the house trying to make as many renovations as I can before the contractors arrive to tear everything out.  

I have painted all of the walls and all of the ceilings (ugh, and double ugh) in the entire downstairs, splatting paint every which way from Sunday and not really giving a rat's patootie, as I'm going to be replacing all of the flooring in the entire downstairs by the time this renovation project is complete.  It is rather liberating to be able to splat drops of paint and stain all over the floors, and splatter teeny flecks of white ceiling paint every which way, and not care one iota how it affects the surface of anything around you.  Makes quicker work of the whole painting process!

Once that was done, I began systematically removing all the orange wood surfaces throughout the downstairs (I completed the orange wood removal on the upstairs of the house last summer.).  This process involved either sanding each of the surfaces three separate times and then painting them white (then caulking them, taping them up, and getting crisp, clean paint edges), or staining them with three coats of a lovely mahogany stain and then giving them two coats of shiny clear coats.  For the downstairs, this has involved each and every window and door casing on both sides, the three pocket doors, the laundry room door, the laundry room cabinets, the laundry room cabinet doors, the staircase bannister and balusters, and the baseboard moldings.  WHEW!!!

Disaster struck (okay, it was really only a minor setback, but felt rather tragic at the time) when the baseboard moldings began to crack, break, and fall apart completely when jimmied off the walls.  Turns out that the nice fella who reinstalled the baseboard moldings after installing the engineered hardwood floors 16 some odd years ago (by STAPLING the floors on TOP of the linoleum, rather than (a) removing the linoleum and (b) using nails instead of STAPLES -- and, by the way, he didn't even bother to CLEAN the floors before installing the hardwood floors on top of them, so eeew was the word when the hardwood floors started to come up), well this nice fella decided to use some 4 odd inch nails to blast into the side of my walls (and sometimes into the floors, and into the metal flashing at the base of the walls) to reinstall the baseboards.  Which, as those of you who know anything about baseboard removing should know makes it quite a bit of a challenge (hahahaha!  Read nearly IMPOSSIBLE) to remove.  I ended up leaving lovely divots in the walls, and actually took out a couple of chunks at one point.  Ugh.  I gave up.  I quit.  I conceded.  Sigh.   I am now going to pay the contractor to jerry rig the suckers off the wall, have THEM create the damage (and thus have to repair said damage!), and then have them reinstall some very lovely, much taller, much more fabulous painted white baseboard moldings after our new and more lovely hardwood floors are installed.

So, now that I am on my last week of all of this loveliness, it is time to give you some previews!

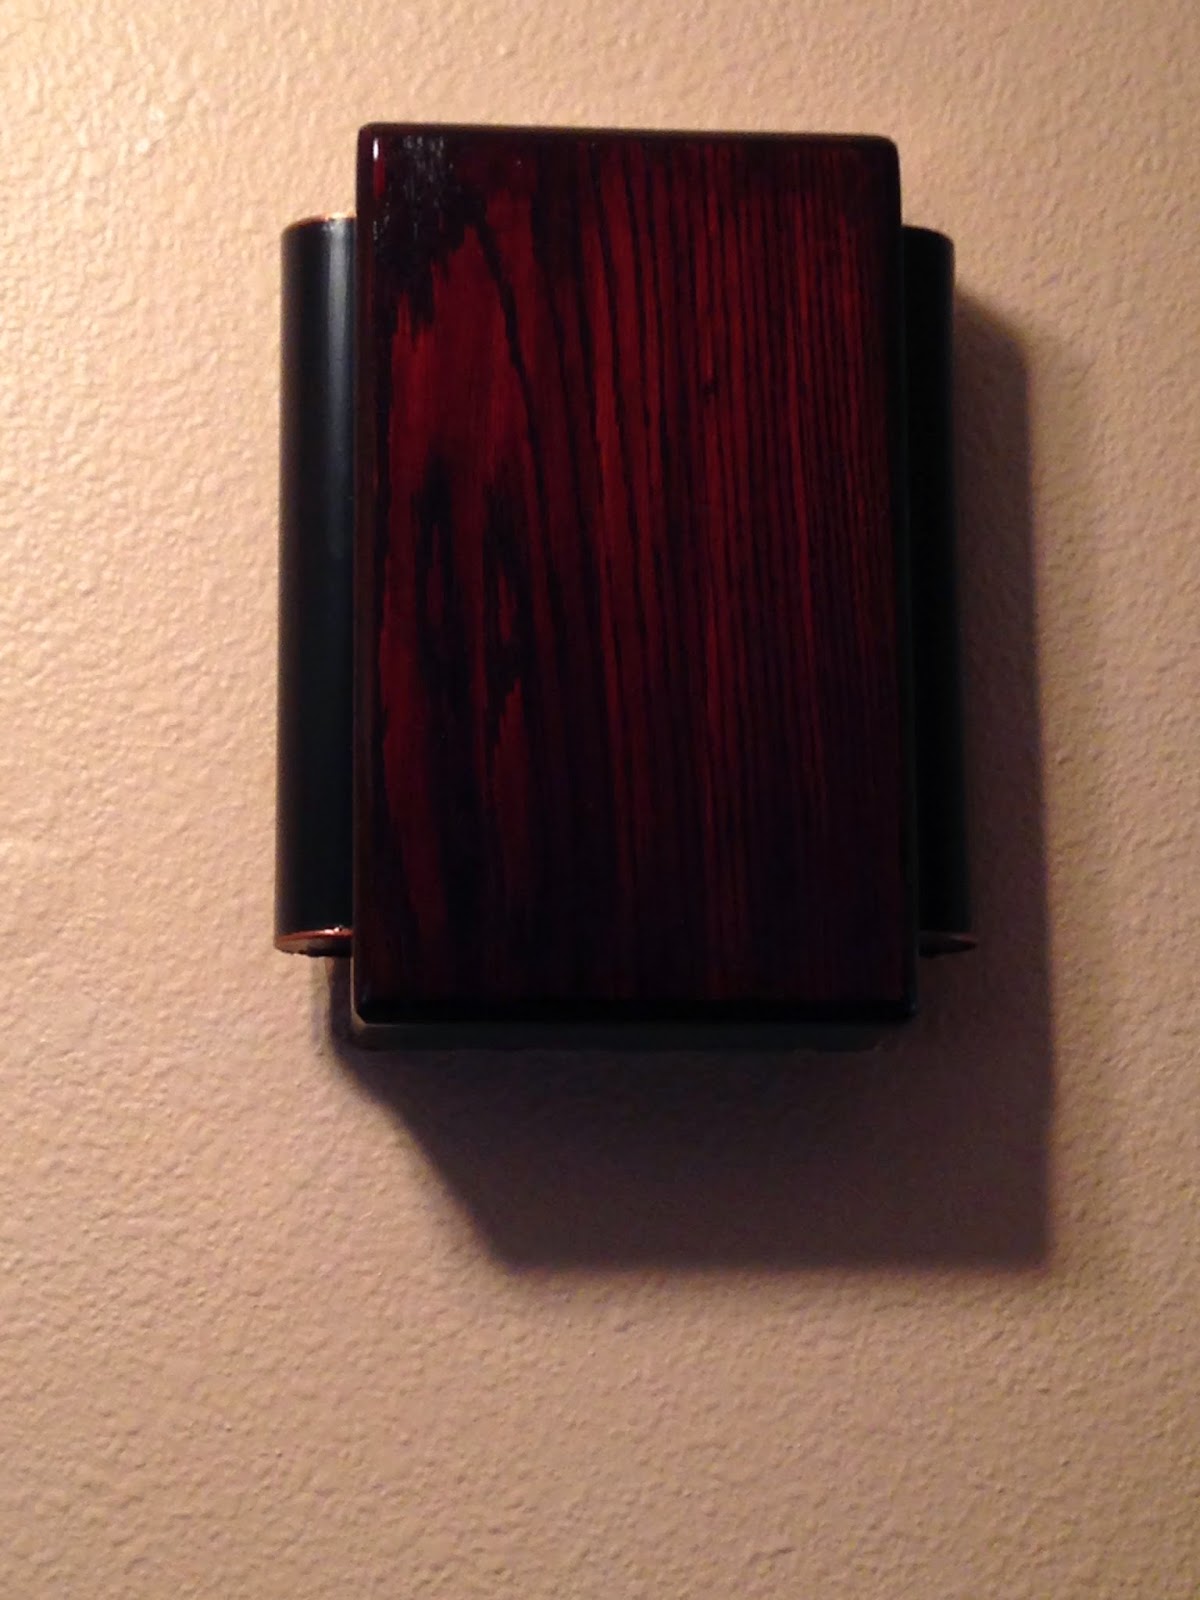
My first mini project to share with you all is the door bell cover on the inside of my house.  I don't know what this thing is called, but it was U-G-L-Y when I got my hands on it.  I tried to buy a new one, but they wanted $50 some odd dollars, and who knows what kind of hick-ville, General Lee car-like song from the Dukes of Hazard would have assaulted my ears every time the door rang had I got stuck with a new door bell.  Mine, albeit ugly, has a nice, simple Ding Dong.  Just like a doorbell should have.

I had a TERRIBLE "before" shot.  I tried to crop and cut and paste it up a bit to give you a before/after shot of the doorbell box.  It was that lovely (can you FEEL my sarcasm dripping off my words?) ORANGE wood, with gold "bells" on either side. 

So here's the before / after shot:


Then I thought I'd talk you through the steps, should you wish to follow suit and give your doorbell a fairly simple, and really lovely result.

1.  First, I removed the wood part of the door bell cover from the rest of the contraption.  
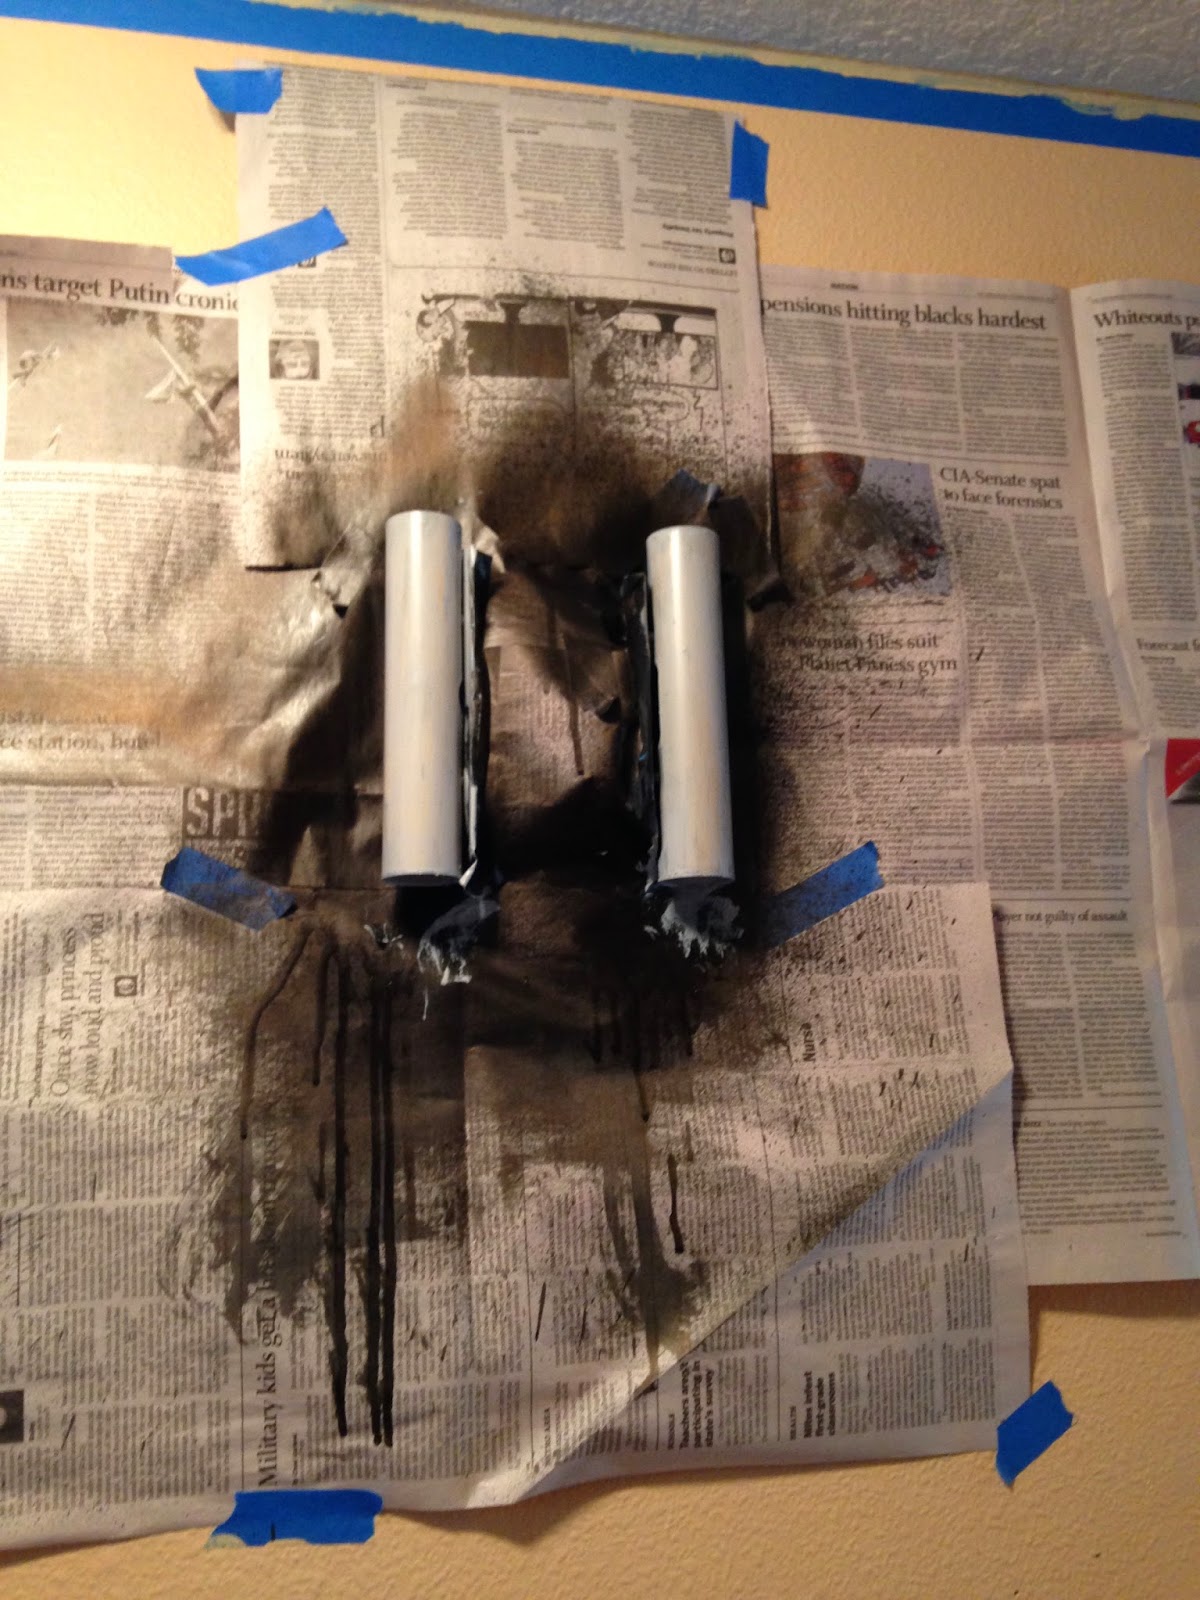
2.  Then, I taped up newspaper all around the rest of the area.
3.  Then, *DO NOT DO THIS STEP!* I made the wretched mistake of spray painting the gold bells black.  I was going for the oil rubbed bronze look.  I ended up with paint splatter EVERY WHERE.  No more spray painting for me.
See?  Disaster!!!  Splatter, splatter, every where.


4.  Then I rubbed all the spray paint off, because it just rubbed right off.  Like I said, it was horrific.

5. THEN I bought some primer and some paint and went to work.  I got the primer and the paint at Home Depot.  The copper paint I picked up at Michaels.  And the oil rubbed bronze door knob is from Home Depot as well.  That's what we're using for our knobs and pulls for the downstairs.  (Upstairs we're using brushed nickel.)  See the teeny tiny stripe of copper around the edge of the knob?  I think it looks fabulous!).


6.  I started with the primer and a nice brush and primed the bells.  Yes, yes, I should have STARTED with this step.  Good to know.  


7.  Once my primer dried, I gave it a second coat JUST to make sure.  Turned out great.

8.  Then, I painted the bells black.  Turned out great.  Starting to feel like I'm redeeming myself.


9.  Next, I taped off the edges, and painted them with "copper penny" paint I picked up at Michaels.  My daughter said that I made the bells look like little Duracell batteries.  I think they looked just like my oil rubbed bronze door knobs (which is in the picture above with the primer and the paints).


10.  Then I removed the tape, and the bells were done.  Sweet!


11.  Then I started in on the doorbell box itself.  I sanded and stained and sealed the doorbell box and got it ready to go.


12.  And here is the finished doorbell box!


I think it looks amazing!