Star Wars Party!


For my kiddo's birthday, we had a Star Wars Party.
Each child went through several stations throughout the party to go from Jedi Padawan Learner to Jedi Knight.
First, in the invitation, I asked each guest to wear a white shirt and khaki pants. I made everyone a Jedi Padawan Learner Vest and a braided clip on hair piece. As each kiddo went through Jedi training, they received the rest of their Jedi Padawan gear.


At their first station, we discussed some of the things Jedi Knights needed to learn how to do and things they needed to know. Mostly we talked about being kind toward others, protecting others who couldn't protect themselves, and giving assistance to others without being asked, and without asking for a reward. At the end of this talk, I handed out their Jedi Padawan Gear.
At their next station, each person received an Ewok.
 I gathered "donations" of teddy bears from friends, from the Dollar Store, and from Good Will. I popped them all in the wash (JUST to make sure no one was going home with unwanted guests of the insect variety). Then I made each Ewok an Ewok headdress. These look a lot harder to make than they were. I bought some leather-looking fabric at JoAnn's. Again, I cut the fabric into a rectangle, folded it in half length wise, slid the fabric on top of the bear's head, then put safety pins on either side to secure it in place. I sewed up one side, securing the front of the headdress to the back, then sewed up the other side so that the headdress was quite tight against each bear's head.
Then, with sharp scissors, I felt for the bear's nose, and cut a small circle around the bears eyes and nose. Then, again feeling around, I cut a small slit for each ear, and pulled the ears out. They turned out SO cute!!!
Then each Padawan Learner took their Ewok through the lands of Endor on an obstacle course. This task was to help teach the Jedi Padawans the importance of caring for others and protecting them at all costs. They got to take their Ewoks home with them at the end of the day.
After Ewok training, we refueled; eating pizza, and having a little cake.


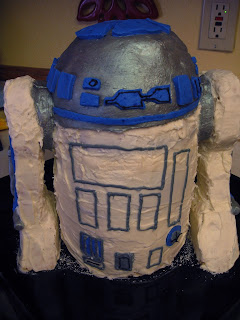


I went to Build A Bear and got a sound piece (the round white speaker in front). When you pressed the button, the button would play the Star Wars theme song. How cool is that? His cake played the Star Wars theme song!!!
I made him a Death Star Cake for his family party a few days later.

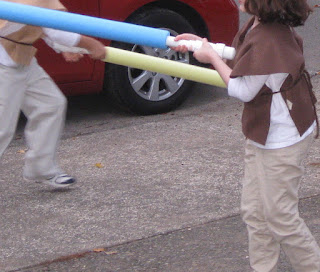
After refueling, the Jedis headed back to the workshop to build their own light sabers. We went to Home Depot and picked up several PVC pipe ends and pieces, and each person built their own light saber. For the saber part, I bought pool noodles and attached them to the ends of their PVC hand grips. Sorry I didn't get a better picture.
Then, after a brief training on best light saber fighting techniques (and how to make proper light saber sound effects), the Jedi Knights took balloons and played with their light sabers for the rest of the party.

No one wanted to go home. At one point, several of the parents ended up with their Jedi Padawan Learner's light sabers, and a second round of duels ensued. What fun!!
Each kiddo took home their padawan braided hair clip, their Jedi Padawan Learner Vest & belt, their Ewok, and their homemade light saber as party gifts.
All in all, it was a fun little party!
* * * * *
Each child went through several stations throughout the party to go from Jedi Padawan Learner to Jedi Knight.
First, in the invitation, I asked each guest to wear a white shirt and khaki pants. I made everyone a Jedi Padawan Learner Vest and a braided clip on hair piece. As each kiddo went through Jedi training, they received the rest of their Jedi Padawan gear.

For their vests, I used a large bolt of brown felt. I cut it into a rectangle. Then for half the rectangle, I cut a vertical slit down the front. Then I gathered some brown rope, and tied it around their middle.

For the clip on hair braid, I bought a wig from the dollar store. I cut it into sections. I braided a thin section, tied off the end with leather rope. I hot glued the other end to an alligator clip I purchased at Michael's. Then I simply clipped the piece to the back of their hair.
At their first station, we discussed some of the things Jedi Knights needed to learn how to do and things they needed to know. Mostly we talked about being kind toward others, protecting others who couldn't protect themselves, and giving assistance to others without being asked, and without asking for a reward. At the end of this talk, I handed out their Jedi Padawan Gear.
At their next station, each person received an Ewok.

Then, with sharp scissors, I felt for the bear's nose, and cut a small circle around the bears eyes and nose. Then, again feeling around, I cut a small slit for each ear, and pulled the ears out. They turned out SO cute!!!
Then each Padawan Learner took their Ewok through the lands of Endor on an obstacle course. This task was to help teach the Jedi Padawans the importance of caring for others and protecting them at all costs. They got to take their Ewoks home with them at the end of the day.
After Ewok training, we refueled; eating pizza, and having a little cake.
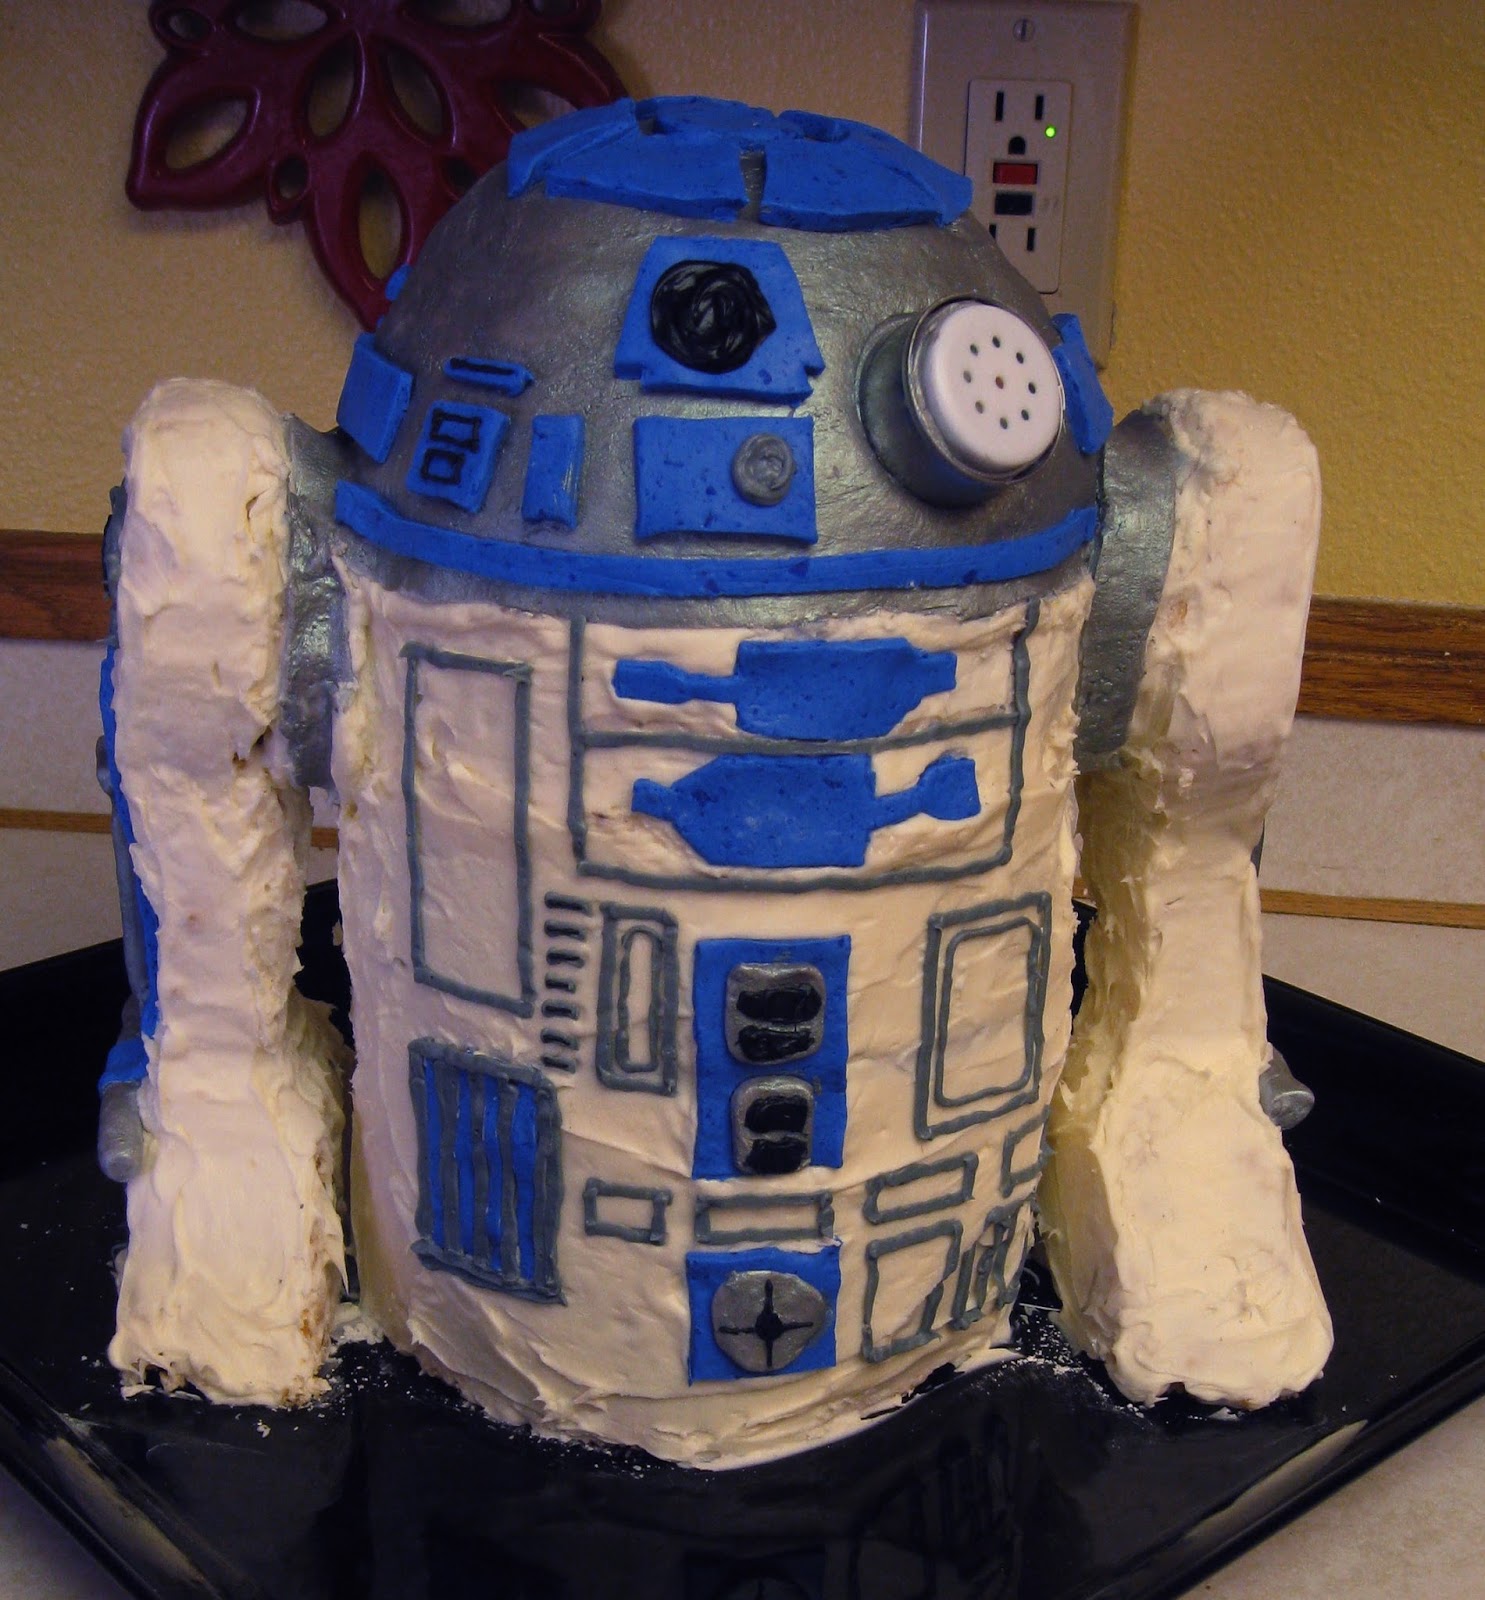


I went to Build A Bear and got a sound piece (the round white speaker in front). When you pressed the button, the button would play the Star Wars theme song. How cool is that? His cake played the Star Wars theme song!!!
I made him a Death Star Cake for his family party a few days later.

After refueling, the Jedis headed back to the workshop to build their own light sabers. We went to Home Depot and picked up several PVC pipe ends and pieces, and each person built their own light saber. For the saber part, I bought pool noodles and attached them to the ends of their PVC hand grips. Sorry I didn't get a better picture.

Then, after a brief training on best light saber fighting techniques (and how to make proper light saber sound effects), the Jedi Knights took balloons and played with their light sabers for the rest of the party.

No one wanted to go home. At one point, several of the parents ended up with their Jedi Padawan Learner's light sabers, and a second round of duels ensued. What fun!!
Each kiddo took home their padawan braided hair clip, their Jedi Padawan Learner Vest & belt, their Ewok, and their homemade light saber as party gifts.
All in all, it was a fun little party!
* * * * *