Sunday, May 29, 2016

Granini's Mushroom and Caramelized Onion Soup


Granini's Mushroom and Caramelized Onion Soup

This recipe is insanely easy, and very fast.  If you're not making homemade rolls to go with it, you can have this soup from start to table in 20 minutes -- including veggie prep time and cook time!

Ingredients:

1 onion, diced
2 Tablespoons butter 
2 teaspoons balsamic vinegar
2 teaspoons sugar
1/2 teaspoon salt
5 or 6 white mushrooms, diced
1 quart Miso Ginger Broth *
1/2 cup barley **

*I buy my Miso Ginger Broth from Trader Joes because it's awesome.

** I used to do my barley the old fashioned way, which took about an hour before starting my soup.  And I could never get it just right.  It was either infuriatingly under-done, overly chewy, with leftover water at the bottom;  or, it was over-done, too mushy, and gummy.  (To quote from Friends, 'There's got to be a better way, Kevin!') I had almost given up on barley when I found Trader Joe's 10 minute barley.  

Start info-mercial music now.

 Trader Joe's 10 minute barley.  Just toss it in your simmering broth, and it's ready in just 10 minutes, without being too chewy from undercooking, or too mushy from over cooking!!  Heaven!!  I have a picture below, of course, for those of you who like pictures.

*** If you don't have a Trader Joe's near you, sniffle sniffle, here's a little pity party for you.  Sniffle, sniffle.  I feel so bad for you!!  Pity, pity party.  Sniffle, sniffle. ***

Directions:
  1. If you're making your barley the old fashioned way (non-instant barley), follow the directions on the package, and prepare 1/2 cup.  Sometimes preparing barley can take a rather long time.  So keep that in mind.
  2. Melt the butter over medium heat in a saucepan.  Do not use a 'nonstick' pan, as the onions just won't caramelize properly.  
  3. Add in the diced onion, balsamic vinegar, sugar and salt.  Stir these ingredients together completely, and cook over medium to medium high heat, until all the onions are beautifully caramelized.  (This is the same technique I use when caramelizing my onions for french dip sammies.)
  4. Once your onions are fully caramelized, a beautiful golden brown and completely soft, add in your diced mushrooms, and allow them to soften.  (I have browned my mushrooms à la Julia Child, careful not to crowd the mushrooms, but I found that the extra time and effort doesn't really seem needed for this recipe, as the broth will eventually obliterate the browning and ever so slightly stiffening effect of Julia's mushrooms.  I save the effort for her mushrooms for when I'm serving them on top of oh, say, a yummy steak.  But I digress.)
  5. Slowly pour in the entire quart of Miso Ginger Broth.  Allow the broth to come to a full simmer.
  6. Add in 1/2 cup of 10 minute barley (or your previously prepared barley), and allow the broth to simmer for ten minutes.
  7. Taste to see if you need any additional salt or pepper, and add as necessary.  I love it just the way it is, without anything else!  
  8. Serve and enjoy!  I always make my mushroom, onion, barley soup with Dinner Rolls.  I'll pop that recipe up next.  (For GranNini's Dinner Roll recipe, click here.)
For those of you who like pictures, here you go!

Add in your salt, sugar, and balsamic vinegar to your onions and butter.

Oooh, those onions are beautifully caramelized!

Add in your sliced mushrooms.


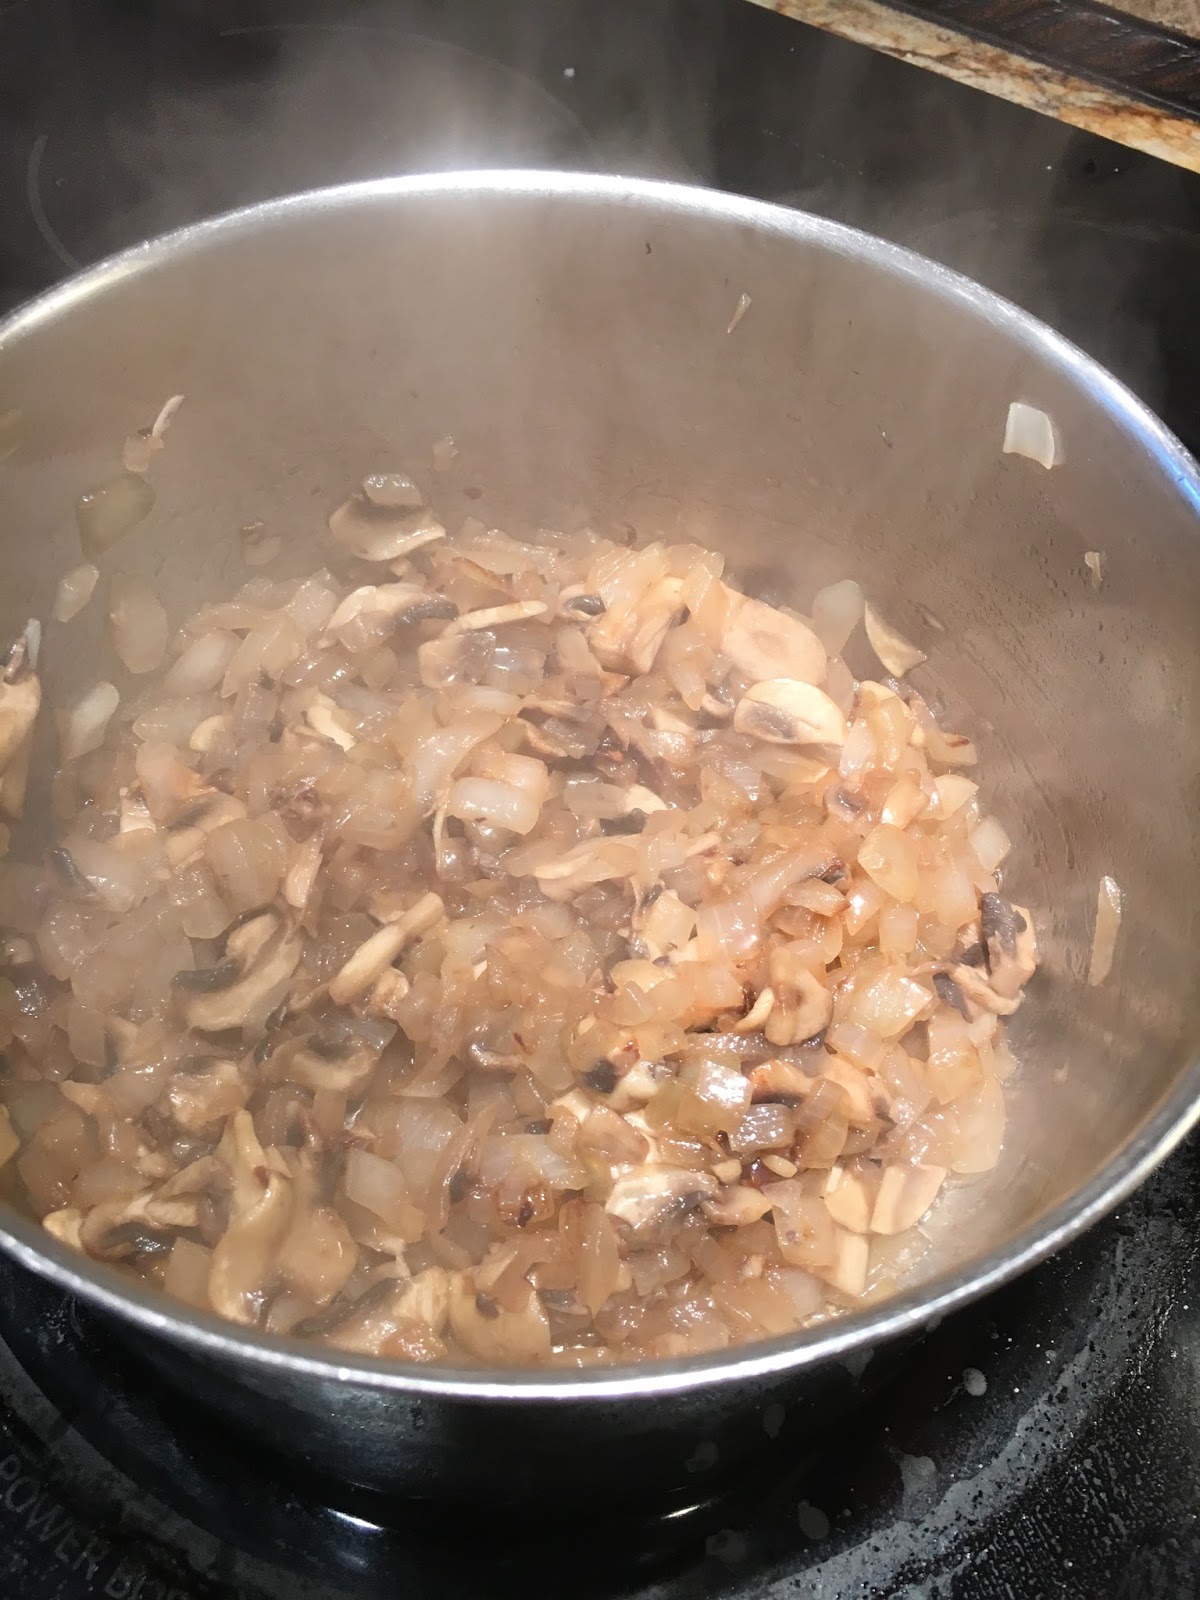
Cook the mushrooms down until they're golden and soft.

And now for my Trader Joe's ad! hahaha.

Trader Joe's Miso Ginger Broth.  I usually find it on the bottom shelf of their boxed broths, under their vegetarian tomato veggie broth.  I make a yummy soup out of that too, but this one is my current fav.

 Here is my newest Trader Joe's Find: 10 minute Barley!

 Add in your miso ginger soup.  After it simmers, add in your barley and cook for 10 minutes.

Mmmmmm.  Tasty!!


Enjoy!

 * * * * *


Monday, May 23, 2016

GranNini's Blueberry Coffee Cake


GranNini's Blueberry Coffee Cake
(a variation on a theme)

Topping:
2 Tablespoons flour
1 cup firmly packed light brown sugar
1 teaspoons ground cinnamon
2 Tablespoons unsalted butter, melted 


Cake:
2 2/3 cups flour
1 1/4 teaspoons baking powder
1 teaspoon baking soda
1/2 teaspoon salt
1 cup unsalted butter, softened (2 sticks)
1 cup plus 2 Tablespoons granulated sugar
1 teaspoon vanilla
4 eggs
1 1/4 cups sour cream
1 cup blueberries, thawed or fresh, 

Preheat oven to 350 degrees.  Grease and lightly flour a 9-by-13- inch baking pan.

To make topping: In a bowl, whisk together the flour, brown sugar, and cinnamon until blended.  Stir in the butter until the topping is crumbly.  

To make cake: In a bowl, whisk together the flour, baking powder, baking soda and salt until well-blended;  set aside.

In a stand mixer set on medium speed, beat the butter and sugar until creamy.  Beat in the vanilla and the eggs, one at a time, until well-blended, scraping down the sides and bottom of the bowl as necessary.  Add flour mixture and sour cream alternately to sugar mixture, beginning and ending with flour mixture.  Scrape down the sides and bottom of the bowl.  The batter should be smooth and blended.  

Spread half of the batter into the prepared baking pan.  Drop several dollops of the topping onto the batter.  Sprinkle 1/2 the blueberries onto the surface of the batter.  Then, dollop the remaining batter into large dollops across the top, and spread the batter smoothly across the surface.  Scatter the remaining 1/2 of the blueberries on top.   Feel free to gently press the blueberries into the dough.  Don't press too hard.  You want the blueberries to stay on the top.  The berries will naturally sink in a little bit.  I don't care for the blueberries to be sitting on the top, I prefer the berries to be poked in about 1/2 way up the berry.  But that's just my preference. Finally, sprinkle the reserved topping over the batter.  Bake until the cake has risen and browned and a toothpick inserted in the center comes out clean, 40-45 minutes.  Let the cake cool in the pan for at least 15 minutes.  Cut into 12 pieces and serve.

For those of you who like pictures, here you go!

Spread the batter into the prepared pan.

Put on a few dollops of the topping into clumps.


Sprinkle on 1/2 of the blueberries.  They will naturally sink a little bit. That's groovy.

Dollop on the remaining batter into big dollops.


Smooth the batter as best as you can.  Some of the blueberries may burst and change the color of your batter.  And some of the topping may mix in.  That's all okay.

*At this point, sprinkle on the remaining blueberries.  Feel free to press them in lightly into the batter, but don't press too far down.  The goal is to have 1/2 the berries sink toward the bottom, and this half of the berries to stay toward the top, so that you have an even distribution of berries throughout your coffee cake.

Sprinkle on the topping.  Pop it in the oven.

Mmmmmm, boy, that smells great!!!


* * * * *

Thursday, May 12, 2016

GranNini's Lemon Almond Cake - Gluten Free!


GranNini's Lemon Almond Cake


So I found this recipe on Pinterest from Cakelets and Doilies (cakeletsanddoilies) for a tasty Lemon, Ricotta and Almond Flourless Cake, which was evidently adapted from Donna Hay Magazine Winter June - July 2013.  But, alas, I didn't have half of the correct ingredients.  Determined to make the cake nonetheless, I fudged my way through the recipe, substituting willy nilly as I saw fit, and WOW, did I end up with a tasty breakfast treat!!!

I made mine the night before, and it was super moist and delicious the next day -- EVEN though I forgot that I had made it, and left it, uncovered, all night long.  I'm quite sure it will be even more moist and delicious if I were to (a) serve it up the same day or (b) cover it in an air tight container or (c) cover it with plastic wrap because I'm (gasp!) not overly paranoid about that sort of thing.

So here is my version of the tasty cake.  

Ingredients:

1/4 cup sugar (and) 1/3 cup sugar (weird measurement, I know, just go with it.)
4 egg whites (you will use the egg yolks later)
1/2 cup unsalted butter, softened
3/4 cups sugar (yes, a third measurement of sugar.  
It's just easier for me to separate out the sugar this way.)
4 egg yolks
2 teaspoons vanilla
1 Tablespoon lemon extract
10 ounces cream cheese, softened
2 1/2 cups almond meal
1/4 cup shaved / sliced almonds
powdered sugar for dusting

Directions:
  1. In a mixer, whip the 4 egg whites until soft peaks form.  Slowly add in 1/4 cup sugar.  Beat a few more minutes, then beat in the final 1/3 cup sugar until stiff peaks form.  Use a rubber spatula to scrape all this tasty sweet yumminess into an awaiting bowl.
  2. Preheat your oven to 325°. 
  3. Line a Spring Form Pan (8 - 9 inch) with parchment paper, and spray lightly with cooking spray.
  4. Cream the butter and sugar together.  Add in the egg yolks, one at a time.
  5. Add in the vanilla and lemon extract.  
  6. Add in the softened cream cheese, and mix thoroughly.
  7. Slowly mix in the almond meal.  (By the way, I buy mine at Trader Joe's, because, well, Trader Joe's is awesome.  I ❤ Trader Joe's.)
  8. Slop in 1/3 (or so) of the stiff, sweetened egg whites.  Mix in thoroughly.
  9. Gently then add in the remaining 2/3 of the egg whites.  Very, very gently stir in the egg whites until they are just incorporated.
  10. Gently ladle your cake batter into the awaiting Spring Form Pan. 
  11. Lightly cover with shaved / sliced almonds. 
  12. Bake at 325° for 40 to 45 minutes, or until the middle is no longer jiggly.
  13. Allow the cake to cool completely.
  14. Release the cake from the Spring Form Pan.
  15. Dust the cake lightly with powdered sugar and serve.
A few things to consider:

* I used a traditional 8 inch cake pan, and ended up with way too much batter left over.  It positively lopped over the edges and domed at the top.  So I ladled some of the extra batter into a very small cake pan, and had a tasty snack (mmm!) while awaiting the remaining cake to cool.  I do believe that a deeper Spring Form Pan would make all the difference.

*I forgot to add my almonds before I baked the cake, and simply added them after.  That worked okay.  And I'm sure no one was to the wiser. But I do believe that should I make this again, I would add the decorative sliced almonds BEFORE I baked the cake, so that they could adhere to the cake itself a bit.  

* This cake was very moist -- quite the surprise for a flourless cake!  In the future, however, if I didn't mind adding a wee bit of gluten, I might consider changing up the recipe to add in an additional 1/2 cup flour, and reducing the almond flour by 1/2 a cup.  The texture was "nutty," due to the almond flour, and I much prefer a very smooth textured cake.  BUT, that said, I've never made a gluten free dessert before, and I was most pleased with the tasty deliciousness that this cake provided.  I couldn't believe how moist it was, even the next day after I'd forgotten to tuck it away in an airtight container, or at least cover it with saran wrap.

* ALSO, when I flipped my cake out of the cake pan, I noticed that the bottom of the cake was quite a bit prettier than the top, and that the top sank just a bit.  So I flipped the cake back over again using a second plate, and used the bottom for the top.  I was much happier with the results, even though I did end up with several crumbs poking out here and there.  Because the cake was so moist, I simply pressed the crumbs back into the cake, and the problem was solved.  (Even if I did kinda sorta accidentally on purpose nibble on as many of them as I could before pressing the rest into the cake.)

A VERY tasty gluten-free cake.  And if I hadn't even reminded you it was gluten free, you never would have noticed.  Oh so tasty and delish!


* * * * *

Tuesday, May 10, 2016

GranNini's Cinnamon Bread for French Toast


GranNini's Cinnamon Bread for French Toast

This recipe is truly just a white bread recipe, rolled out into a large rectangle, smothered in butter, brown sugar and cinnamon, rolled up into a loaf, and then baked.  Pretty easy, all things considered.  And the results are truly delish.

White Bread Ingredients:

1/2 cup warm (but not hot) water
1 Tablespoon yeast
1 Tablespoon sugar
1 egg, beaten
1/2 cup Crisco, melted
1 1/4 cups warm (but not hot) water
3/4 cups milk
1 Tablespoon salt
1/2 cup sugar
8 cups flour

For the Cinnamon Sugar Innards:
(These amounts are all rough guestimates.  I use just enough butter to cover my rolled dough.  I use just enough brown sugar to cover my butter.  And I lightly sprinkle the cinnamon on.  Too much cinnamon is actually over-powering and over-whelming and distracts from the taste. I was surprised to find that to be the case.  So these amounts, below, are rough guestimates.)

1/2 cup unsalted butter (divided into 3), softened
1 cup brown sugar (divided into 3)
3 Tablespoons cinnamon

For the French Toast 
(which I'd make the next day, because who in their right mind gets up 2 1/2 hours BEFORE breakfast to make the loaves of bread for their French Toast, when they could simply make the bread the day before, and get up at a reasonable hour the next day?!?

4 eggs
1/2 cup milk
1 teaspoon lemon juice
1 Tablespoon vanilla
1 Tablespoon cinnamon
1 teaspoon nutmeg

Directions for the bread:

  1. Sprinkle the yeast onto the warm water.  Add in the sugar, and allow to sit for 5 minutes.  Gently stir.
  2. Add in the egg, crisco, water, milk, salt and sugar.  Mix thoroughly.
  3. Mix in 3 cups of the flour.  Stir thoroughly.
  4. Slowly add in 4 more cups of flour, scraping down the sides of the bowl as necessary.
  5. For the final 1 cup of flour, I sprinkle some onto a clean surface, and pour my dough onto my floured surface.  Slowly, I knead the remaining one cup of flour into the dough ball.  
  6. Knead for 8 to 10 minutes.
  7. Lightly spray a large bowl with cooking spray.  Place the dough into the bowl, and cover with saran wrap.  Place into a proofing oven for 1 1/2 hours.  If it's a warm day, feel free to allow your dough to double in size by simply leaving the covered dough out on the counter, but not in direct sunlight.
  8. Allow the dough to double in size.
  9. Remove the dough, and pour it out onto a lightly floured surface.  Split into 3 even sized balls of dough.  ** Read step 10, make a decision, then move on to step 11. **
  10. ** If you simply want to have white bread, you can simply roll your dough out into a rectangle, roll it up, and then plop it into lightly sprayed bread pans.  Allow to raise for 30 minutes, and then bake for 40 minutes at 375°.  Allow to cool for 10 minutes, then turn out onto a cooling rack.  If you simply can't resist, slice open ONE of the three loaves, slather on lightly salted butter, and devour the remaining loaf because it's near to impossible not to.  HOWEVER, if you're able to resist the temptation, the bread is truly scrumptious when it is cooled completely as well.  Also makes great toast.  Or, you could make french toast with it at this stage as well.  BUT, if you REALLY want outstanding French Toast, move on to step 11 now.  **
  11. Take one of the 3 sections of dough.  Flatten the dough and roll it out into a rectangle, roughly 1/2 inch thick.  Smear with softened butter.  Smother with brown sugar.  Sprinkle with cinnamon.  
  12. Roll the dough up into a spiral, and gently place into a lightly sprayed bread pan. 
  13. Repeat steps 11 and 12 with the two remaining loaves.
  14. Allow the dough to rest and rise for another 1/2 an hour.  I don't bother with the proofer.  I just keep it on the counter.  Mine doesn't generally rise too much, but it will rise in the oven while baking.
  15. Bake for 40 minutes at 375°.  Allow to cool for 10 minutes, then turn out onto a cooling rack.  If you simply can't resist, slice open ONE of the three loaves, slather on lightly salted butter, and devour the remaining loaf because it's near to impossible not to.  HOWEVER, if you're able to resist the temptation, the bread is truly scrumptious when it is cooled completely as well.  Also makes great toast.  Or, you could make french toast with it once it has cooled completely.

Directions for the French Toast:


  1. Heat up a griddle to 300°.   
  2. Slice the cinnamon bread into THICK slices.
  3. In a large bowl, whisk the eggs together.  Add in the remaining ingredients and whisk until thoroughly incorporated.  The cinnamon will float to the top. Don't fret.
  4. Lightly spray your griddle with cooking spray.
  5. Dip and dunk a piece of bread into the egg mixture.  Place the dripping gooey mess onto the griddle.  Repeat with each piece of bread until the griddle is covered.
  6. When the underside is lightly brown and firm, flip the bread over.  The French Toast will cook much faster on the second side.
  7. Serve with softened butter.  Some people like a sprinkle of powdered sugar. Some people like maple syrup.  Some like blueberry gravy (also known as homemade blueberry syrup -- see the recipe here).  Some like it with peanut butter.  Some like it straight up.  Some like it with berries and bacon on the side.  Serve however you see fit.  But no matter how you serve it, it is sure to be super tasty and delicious!!
For those of you who like more pictures, see below!


* * * * *

Sprinkle yeast and sugar onto warm water.

 Let sit for 5 minutes then stir.

 Add in egg, milk, water, salt.

 Add in 3 cups of flour and stir.

 Lookin' good!

 Add in 4 more cups of flour.  It's getting stiffer.
That's what she said.

 Pour it out onto a lightly floured surface.

 Knead in the remaining cup of flour.
Knead knead knead.

After 8 to 10 minutes, all the flour should be incorporated, your dough should be pliable.  And if you watched the Great British Baking Show, you should have learned that you can pull a small section off, stretch it out a bit, and if you can see through it, your dough is ready.

Pop it in the proofer for 1 1/2 hours and let rise!


I forgot to take a picture before I started to cut it into 3 sections.  Whoops.

 Roll out your dough.

 Smear it with butter.

 Sprinkle it with brown sugar.


The picture on the left shows way too much cinnamon.  The right one is a bit heavy too.  So don't over do it on the cinnamon.  For your taste bud's sake!

 Roll it on up.  And plop it into the lightly greased bread loaf pan.

All three loaves, sittin' on the counter. K-I-S-S-I-N-G.
Waiting for 1/2 an hour before baking. 


Ooooooh, smells gooooood!

Ready for slicing!

 OOOOH, so pretty!

Dipped in the batter and on the griddle. 

Flip it when it's golden brown.

Smother it in butter, serve with fruit and bacon.  mmmm. Bacon.

And, for what it's worth, my favorite bacon is Trader Joe's Apple Smoked Bacon.  Next time, before I slice open a package, I'll try to remember to take a pic for all y'all who haven't yet experienced TJ's heaven.  I slice my bacon in half, line a jelly roll pan with parchment paper, turn my oven on to 375°.  I take my time and arrange my bacon on the parchment paper.  I don't wait for the oven to finish heating up.  I pop my bacon in the oven, and bake for roughly 23 minutes.  Sometimes it needs a wee bit more.  But it always seems to turn out perfectly.  And the parchment paper makes clean up a snap!  And oh, my! is it tasty!!

Enjoy!


* * * * *