Tuesday, April 21, 2020

Granini's Monkey Bread - the cinnamon kind

Granini's Monkey Bread


Much better!!

The first time I made monkey bread, it was a complete disaster. The biscuit dough was too mealy. The dough didn't cook all the way through. I filled the pan way too full. The syrupy goodness dripped down into the au gratin potatoes that were baking on the shelf beneath the monkey bread. The bread was way too salty, and no one liked it. Super duper sad.

So, I took what I learned, and WOW, what a difference!

This time I used my dinner roll recipe for the dough, used half unsalted and half salted butter for the caramel sauce, and mmmmm boy howdy it was delicious!!

So here you go!


Ingredients:
For the dough:

1 package yeast (2 1/4 teaspoons)
1/4 cup warm water
1 cup scalded milk
2 Tablespoons butter (salted or unsalted, doesn't matter)
2 Tablespoons sugar
1 teaspoon salt
1 egg, beaten
3 1/4 cups flour

Sprinkles:
1 cup sugar (next time I'm going to use ¼ cup sugar and ¾ cup brown sugar)
2 teaspoons cinnamon (next time I'll add 3 teaspoons)
¼ teaspoon nutmeg

Sauce:
¼ cup maple syrup
3/4 cup brown sugar
2 teaspoons cinnamon
½ cup melted butter (unsalted)
½ cup melted butter (salted)

Directions:
  1. Sprinkle the yeast onto the warm water. Give it a vigorous whisk, and allow to sit for about 5 minutes.
  2. To scald the milk: place milk in a reactive (a metal pan, rather than a nonstick one) saucepan on medium high.  Allow the milk to come to a full simmer.  When the milk starts to climb the sides of the pan, pull it off the heat.
  3. Add butter to the very hot milk.  Allow milk to cool for about 10 minutes. I usually put mine in the fridge to cool.
  4. Add the sugar and salt. Whisk around. Add in the egg and whisk thoroughly.
  5. Add ½ cup of the flour and stir completely.  Slowly pour in the milk, and stir. Mix in the remaining flour.
  6. Turn on your oven to 400℉.
  7. Knead the dough for roughly 5 minutes.
  8. Lightly spray a clean, large bundt cake pan with cooking spray.  Make sure to coat all the nooks and crannies.
  9. No, I did not let my dough proof in an oven. I was, however, busy making breakfast, so it probably sat on the counter for 14 minutes or so.
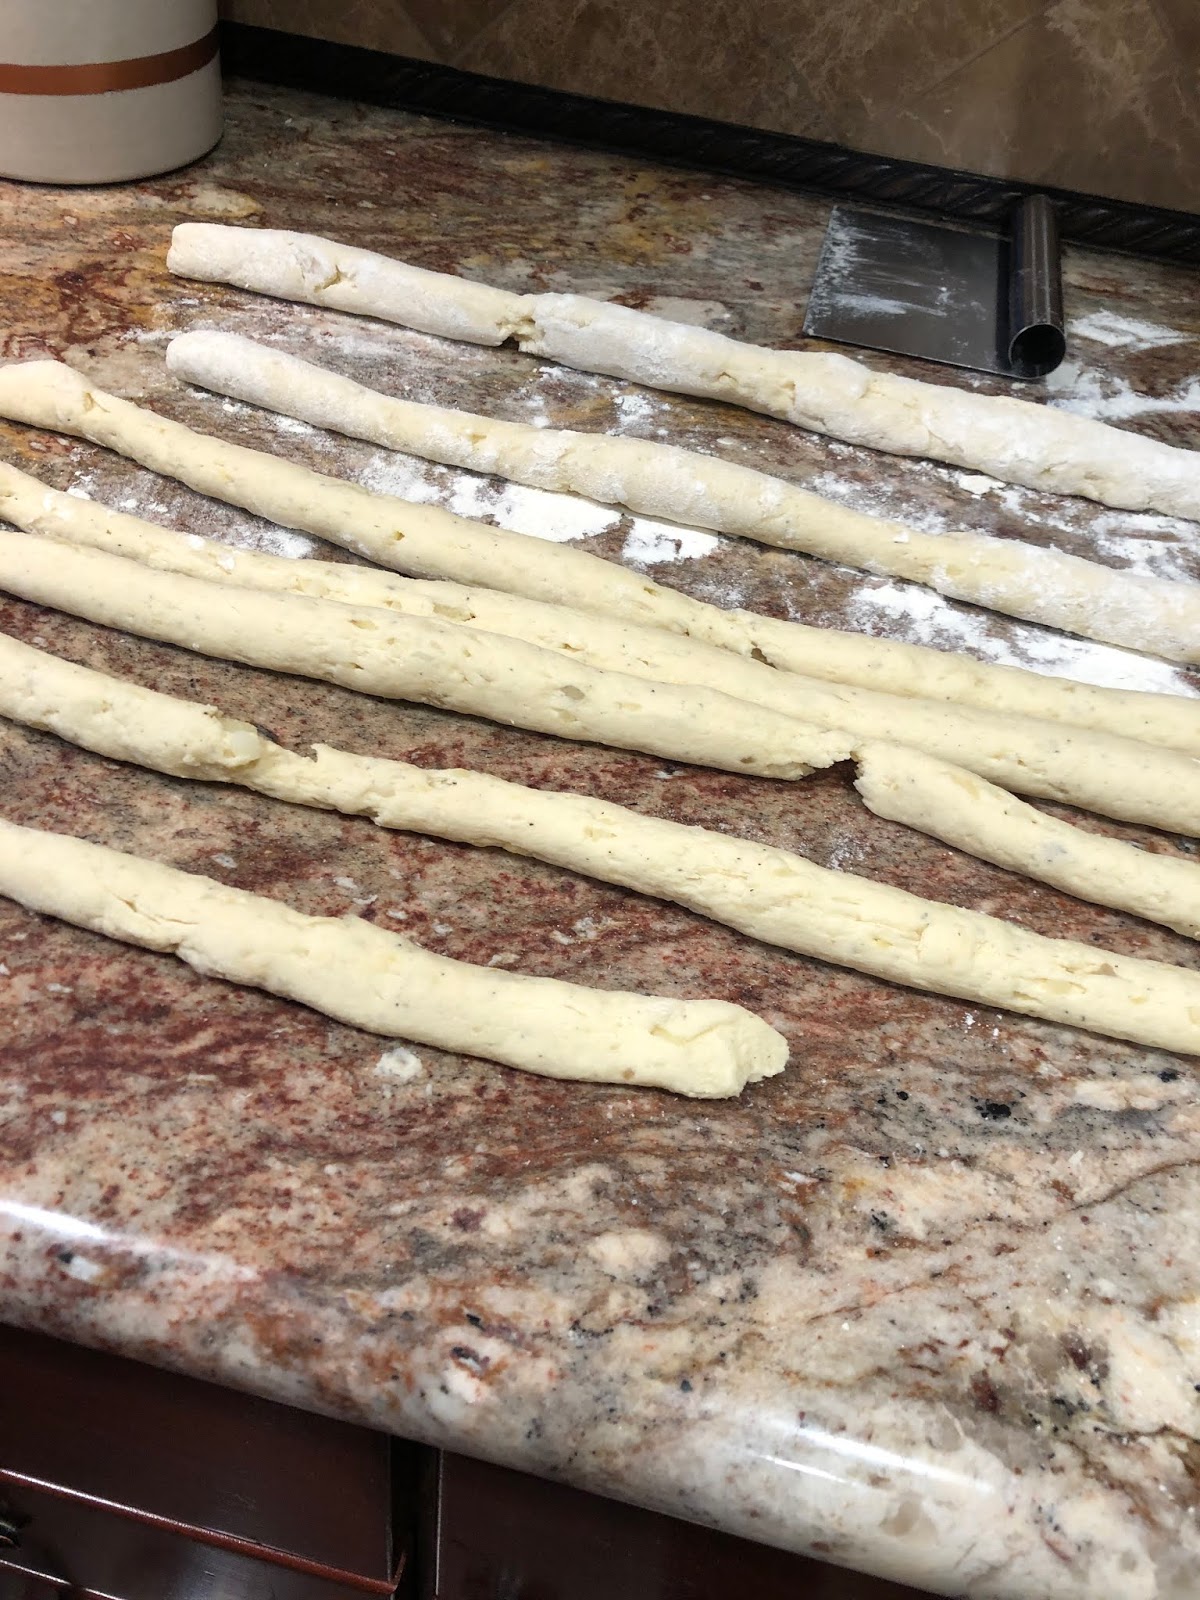
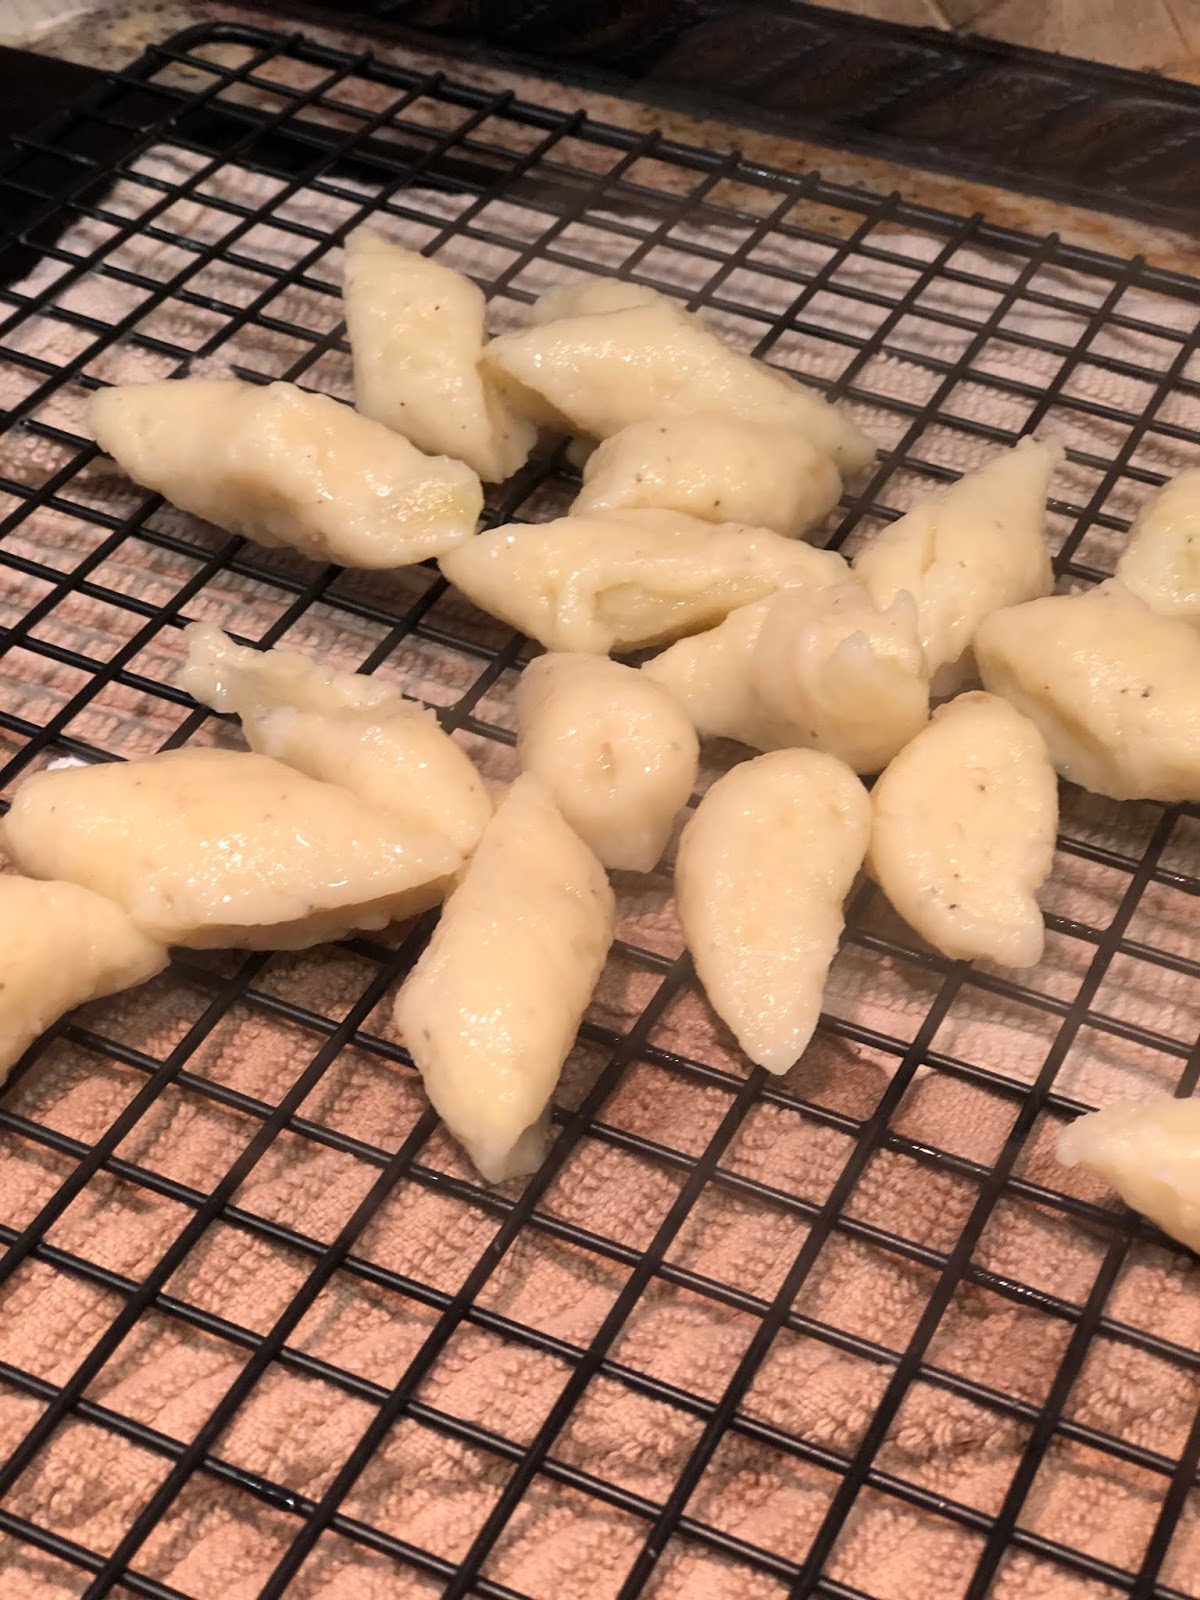
  10. Split the dough into small pieces. About 1 to 1 ½ inches square or so. No need to be exact. No need to roll them into balls. Just chop them roughly around that size.
  11. Mix your cinnamon sugar and nutmeg together in a medium sized bowl.
  12. Drop each of your small pieces of bread dough into the cinnamon sugar and toss them around, coating all the sides.
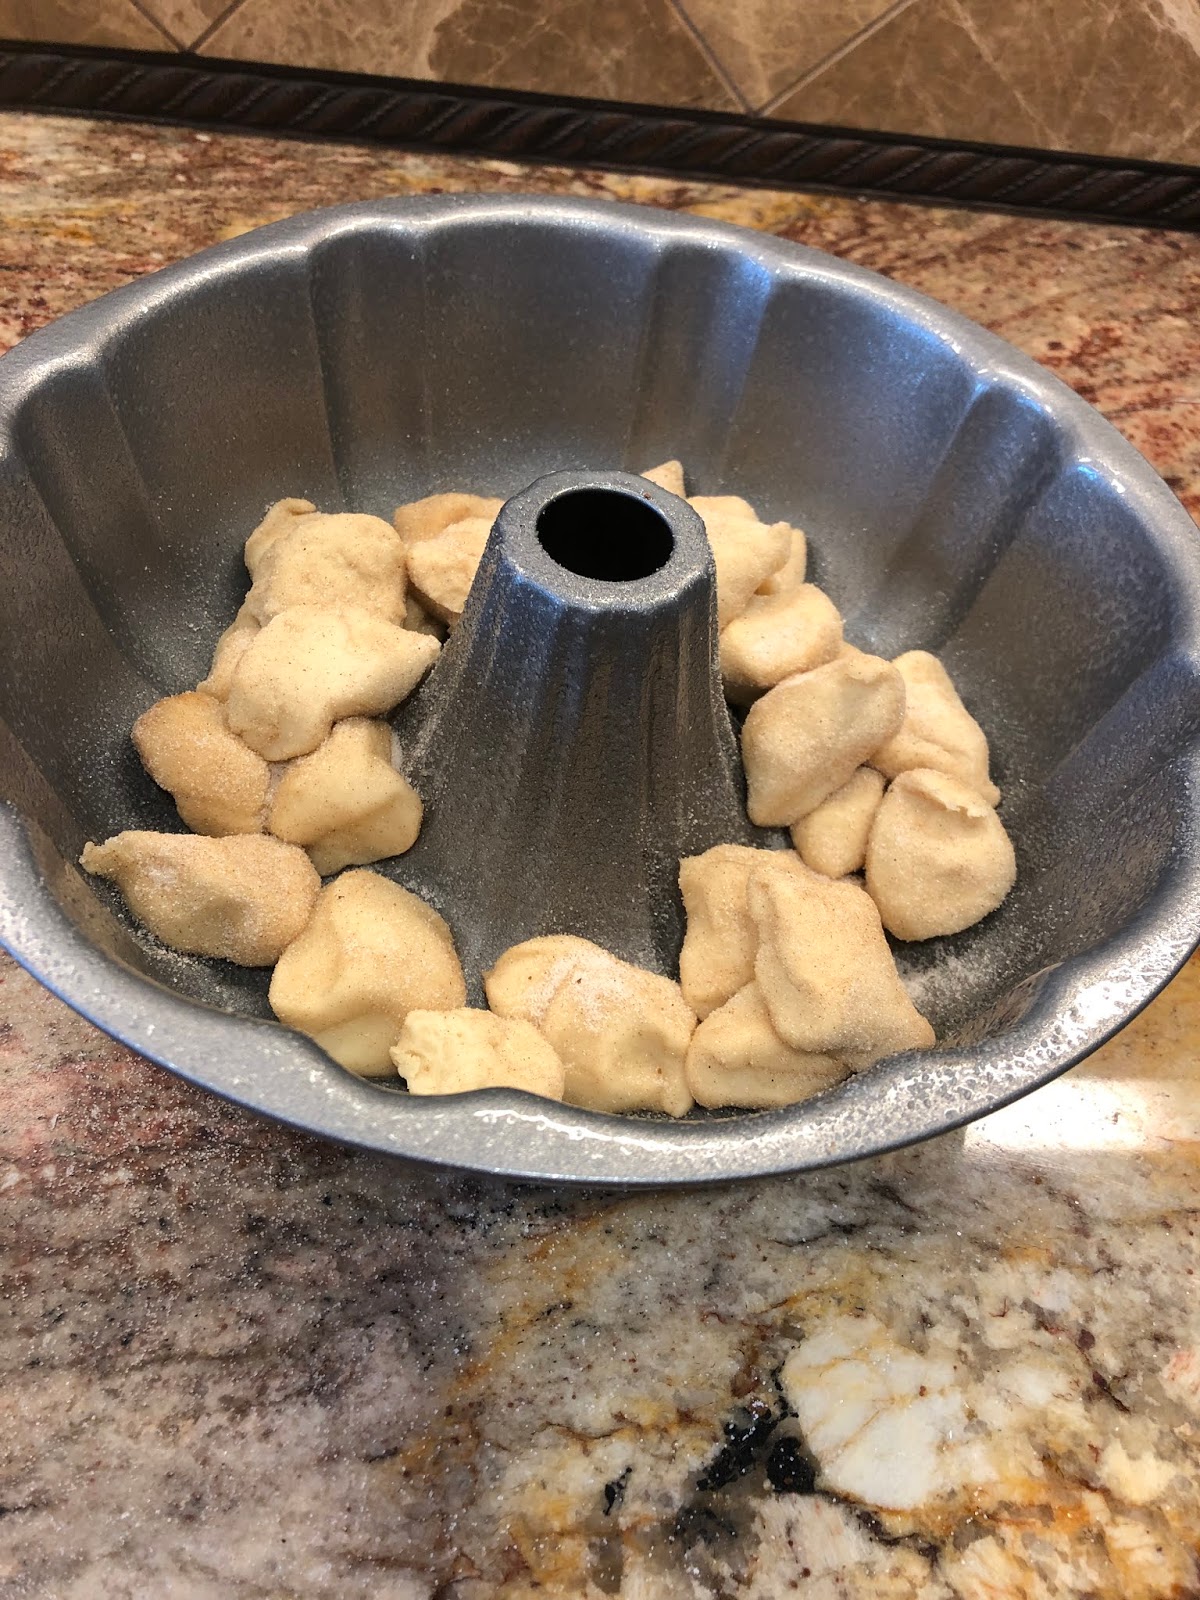
  13. Plunk the cinnamon sugar pieces into your bundt pan, placing them roughly fairly evenly around the inside of your dish.
  14. After each layer (or just every once in a while), sprinkle an additional handful of cinnamon sugar over the whole section of bread dough, just to give the dough even more of the cinnamon sugar goodness.
  15. Melt the butters together and stir to make sure the butter is completely melted. Add in the syrup, cinnamon, nutmeg, and brown sugar. Stir until it is a thick gooey delicious looking texture.
  16. Pour the cinnamon sugar syrupy caramel sauce over the top of the cinnamon bread chunks.
  17. Pop the bundt pan in the oven and bake for 30 minutes or so, or until the whole top is lovely and medium brown. After 24 minutes, keep an eye on it. This is rather tricky. You don't want the caramel to burn, but you don't want the bread to be under baked. So keep an eye on it.
  18. When the monkey bread is ready to come out of the oven, you're not going to let it rest in the pan it baked in. You're going to go ahead and pop it right out onto its plate.
  19. Get a cake plate or a wooden cutting board or a serving dish that is slightly larger than your bundt pan. Using hot pads, very carefully flip your bundt cake upside down (invert it), and lift off the pan. Fingers crossed, and the whole thing will pop out of your pan easily, the underside lovely and caramelized, and your kitchen smelling like heaven.
  20. Allow the monkey bread to cool slightly so that your fingers and your tongue do not suffer third degree burns when you dip in. If any of the caramel oozes off the sides, feel free to use a rubber spatula to schlop the goodness back onto the top of your bread.
  21. When the monkey bread comes out correctly, you should be able to dip your fingers inside and pull out lovely chunks of caramelized bread bits. Like bite sized sticky buns. And boy howdy, is it scrumpdillyicious!!

For those of you who like pictures, here you go:


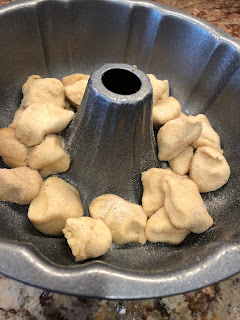
At this point, the bundt pan was barely more than ½ full -- definitely not even 3/4 of the way filled, but I was all out of dough. I honestly thought there wouldn't be enough dough in the pan, and I regretted not making a second batch of dough. But honestly, it was more than plenty!!! The dough rose beautifully in the oven, and baked to perfection.


I thought it looked a wee bit too dark around the edges, but I'd only baked it for about 29 minutes at this point. But it was lovely. I think for me, it might have been better after 28 minutes. I wanted to make sure the insides were baked all the way through.

 Look at that lovely monkey bread!!! HEAVEN!


This is what my monkey bread looked like no more than 12 minutes later. We put the cutting board in the middle of the table, and each of us grabbed a fork. We sat on opposite sides of the table and systematically pulled little pieces off, put them onto our dessert plates, and nibbled. WOW. What a treat!

We obviously decimated the entire thing. My daughter claimed that this new treat was like eating the insides of cinnamon rolls -- all the nice and gooey parts, without the hard crusty outer pieces. My husband, in between happy mmms, said he'd like a wee bit more cinnamon. And when I mentioned that I have a recipe for a savory version of monkey bread, my son said he'd like to eat a garlic parmesan version of the bread. So, I'll definitely be making this again!!!

How might I improve the recipe for next time?

Next time I'm going to roll the pieces in brown sugar and cinnamon (rather than regular sugar and cinnamon), like I normally do when I make cinnamon rolls. I will also add more cinnamon. I may also add in some toasted pecans. And perhaps I'll try not using the maple syrup. I like my caramel sauce nice and sticky, and the maple syrup really did the trick. But when I make cinnamon rolls, I don't use maple syrup. I don't really need to, since the brown sugar and the butter melt together in a lovely way to create a caramel sauce. So, I'll give that a whirl and see if I can perfect the recipe. But honestly, this was pretty darned terrific. The whole thing was decimated in about 12 minutes. Clearly, we liked it!

Alrighty then, until next time!

I'm off to go work on Book 2.5, Jack and Claire's love story.

Who are Jack and Claire? Jack Diamond is a Detective for the Multnomah County Sheriff's Office, who stars as the protagonist in the Jack Diamond Murder Mystery series. Claire is a pediatric cosmetic surgeon who repairs birth defects and specializes in reconstruction after traumatic injuries. They fell in love in college. After years of separation due to work, marriage, murder and life, they finally find their way back to each other.

You can read all about them in Diamonds for Diamond and No One Noticed. They'll also both appear in Book 3 -- a yet to be named book about a massive casualty shooting on a pedestrian bridge in Portland, Oregon.

Click on the links below and get started. Amazon will ship them to you, or you can download and read the e-book versions now!

What are you waiting for? Go get the books now!

* * * * *

I not only bake and cook, I write murder mysteries too!

Both books are available in paperback and kindle versions

Diamonds for Diamond 
(Book 1 in the Jack Diamond Mystery series)
and
No One Noticed
(Book 2 in the Jack Diamond Mystery Series)


* * * * *

Monday, April 13, 2020

Granini's Au Gratin Potatoes

Granini's Au Gratin Potatoes
or as my favorite father-in-law calls them,
Baked cheesy goodness with some potatoes


Ingredients:
5 to 6 medium sized potatoes.
3 Tablespoons butter (salted or unsalted. Either works)
3 Tablespoons flour
3 cups ½ and ½ 
1 ½ cups sharp white cheddar cheese, grated
1 ½ cups sharp cheddar cheese, grated
1 to 2 teaspoons Lawry's Seasoned Salt
½ teaspoon smoked paprika (optional)
A nice sprinkle of regular paprika (optional)


*I typically use yellow potatoes, but red potatoes will work too. I'm not a big fan of using russet potatoes (baked potatoes) for any recipes except for baked potatoes and twice baked potatoes. But that's just me.

Directions:
1. Lightly spray a 9x13 or 8x11 glass baking dish with cooking spray. 

2. Preheat the oven to 350℉.

3. Fill a medium to large pot with hot water, sprinkle in some salt, and bring the water to a boil. While the water is heating up, start peeling your potatoes.

4. Peel all your potatoes.

5. Using a mandolin, thickly slice all your potatoes into evenly sliced pieces. If you don't have a mandoline, just do your very best to get the potatoes as evenly sliced as possible. 

My mandoline looks a bit like this. It is one of my newest, and most favorite, kitchen gadgets. Particularly when it comes to making au gratin potatoes.

6. Now. Here's a trick. When you're putting your potatoes into the boiling water, try to feed the potatoes into the water ONE AT A TIME, but do it quickly. One of the biggest hurdles with au gratin potatoes is having either potatoes that are underbaked and raw and nasty, or, having potatoes that are stuck to each other and thus not cooked properly and not coated with cheesy goodness. Boil the potatoes for about 8 to 10 minutes or so. It's more of a par boil than a true, boiled all-the-way-through kind of situation. You want them mostly boiled, but not so over boiled that they fall apart when you pour them into your baking dish. Once they're done boiling, drain them in a sieve and let them sit there and kinda hang out until your sauce is done.

7. While the potatoes are boiling, you can get your cheesy sauce going.

8. Grate all your cheeses and set aside.

9. In a large skillet with deep sides, melt your butter on medium to low heat. Turn the heat down to low and add your flour, and whisk together, allowing the flour and butter to cook together for a good 5 minutes or so. DO NOT cook the flour and butter on medium or high heat, or you may end up burning your flour and making the whole mess turn brown and taste nasty. Low to medium heat is the trick here.


10. Pour your half & half (you can use milk or cream, but I prefer half & half) into a small sauce pan and allow your cream to heat up a bit on medium to medium high. Don't allow it to boil.

11. Once your flour and butter mixture has cooked for several minutes, sprinkle on the Lawry's seasoned salt, and the (optional) smoked paprika. Then, slowly, a little at a time, pour in a little tiny bit of your heated half & half, using a whisk to bring the mixture together. Do not pour all of your half & half in all at once, or you risk the chance of getting lumps. Low heat, a little at a time. That's the trick here. Once all the half & half is mixed in, raise the temperature of the sauce to medium, or medium high. Bring the mixture to a slight boil, and then turn the sauce back down to low. Raising the temperature will allow the sauce to thicken up. Add in the cheeses, stir, and then turn off the heat.

12. Once the cheesy sauce is done, bring out your lightly sprayed baking dish. Ladle a layer of cheesy goodness onto the bottom of the baking dish. Then add a layer of your potatoes. I tend to slightly stir a wee bit, to try to make sure all the potatoes are covered in cheesy goodness. Ladle another spoonful of cheesy goodness over the top. Then add in another layer of potatoes. Repeat as necessary until all of the potatoes are covered in cheesy goodness. On the very top, sprinkle very lightly with paprika. Bake at 350℉ for about 40-45 minutes or so, or until the potatoes are bubbly and the cheesy mixture is browning lightly on the top.

I usually serve my au gratin potatoes with thick ham slices, deviled eggs, roasted asparagus or my green beans, and my glazed carrots.

Mmmmmmm.


* * * * *

I not only bake and cook, I write murder mysteries too!

Both books are available in paperback and kindle versions

Diamonds for Diamond 
(Book 1 in the Jack Diamond Mystery series)
and
No One Noticed
(Book 2 in the Jack Diamond Mystery Series)


* * * * *

Granini's Monkey Bread Failure

Granini's Monkey Bread Failure


Soooooooo....

I learned a lot about making Monkey Bread for the first time.

1. Do not use my homemade biscuit dough as a base for the monkey bread. Yes, my biscuits are amazing. But for monkey bread? I think I would prefer my dinner roll recipe as the base. (Here's why: My biscuit dough is flakey and crisp on the outside and soft and delicious on the inside normally, but in the failed monkey dough disaster experiment, they were mushy and mealy. Bleh.)

2. I baked my monkey bread per the directions off of several pinterest 'no fail' recipes, and baked them for 30 minutes. They were SOOOO underbaked. I baked them for another 10 minutes, and thought they looked okay. However, they were so not okay. They truly needed another 10 minutes. The insides were underbaked, but not raw. And the caramel sauce had not had a chance to quite set up like it should have.

And why, you ask, did I veer from the recipe that required biscuits in a can? Perhaps my monkey bread would have turned out had I done so. But I veered from the recipe because I never ever ever eat biscuits from a can. Nor do I eat bisquick biscuits. Which is a bit of an inside joke between my husband and I.

The idea of biscuits from a can seems unappetizing to me. I'm sure that if you're brought up with biscuits in a can they can be quite delicious. I have no problem whatsoever with packaged goods. I'm a glutton. I eat pop tarts and peanut butter captain crunch and a whole long list of other foods that are bad for me and are filled with preservatives and so forth. I am not a food snob. I use Lipton onion soup mix, Lawry's taco seasoning, and cream of mushroom soup on a regular basis. I'm also an enormous fan of Tostito's cheese dip -- a quicker and easier way to eat my childhood favorite Velveeta cheese dip  with Rotel tomatoes and chilis, green onions, and cilantro.

 But not once have I ever found the appeal of biscuits in a can. Probably because making biscuits from scratch is a relatively easy feat. Very difficult (for me) to screw up. Tasty and delicious. Flaky, buttery, soft, and oh so tasty. Sometimes when I eat processed food, all I can taste is the weird processed food bits. I can't taste the actual FOOD part. It's almost like eating something that's been served in a bowl that still has soapy water in it. You can taste the soapy water and can't really taste the actual food. When you're brought up with those tastes, they taste fine to you. You've acquired a taste for those extra flavors. But when you've been brought up on homemade biscuits or homemade pie dough it's a challenge to eat something out of a box. The difference between chocolate pudding out of a box and chocolate pudding from scratch is two completely different experiences. So yes, perhaps I am a selective food snob. Some foods just taste better to me when they're made from scratch. Others, I've grown accustomed to and like just fine. So eat the food that tastes good to you. And I'll do my best to help come up with recipes that are easy to follow, use only a handful of packaged ingredients (if any at all), and taste pretty terrific.

3. In the future, note to self, do NOT bake monkey bread on a top rack with cheesy au gratin potatoes directly below them. 
The monkey bread WILL drip over and down. 
And into your cheesy au gratin potatoes.
And all over the bottom of the oven.

UGH.

I was able to scoop the syrupy caramel sauce from the top of the potatoes and dump it out into the sink. I rearranged the items in the oven and placed them both on the top rack. The potatoes ended up turning out just fine. Whew. And the rest of the Easter brunch turned out just fine. But man, what a disappointment.

I don't often fail miserably when it comes to baking when I follow recipes. My greatest mishaps have always been when I try to create something on my own. But man alive, this was one truly disappointing disaster.

Tune in next week when I try them again. Using my Parker House dinner roll recipe.

If they don't turn out, I'll just go back to making my cinnamon rolls
They're amazing.

* * * * *

I not only bake and cook, I write murder mysteries too!

Both books are available in paperback and kindle versions

Diamonds for Diamond 
(Book 1 in the Jack Diamond Mystery series)
and
No One Noticed
(Book 2 in the Jack Diamond Mystery Series)


* * * * *

Tuesday, April 7, 2020

Granini's Chocolate Cake

Granini's Chocolate Cake
with a beautiful mirror glaze


Soooo, this was my very first attempt at a mirror glaze.

Personally, I think it turned out exceptionally well.  With the the teeny tiny itty bitty problem that was.... 

chocolate run-off

The recipe (thanks to Chef Iso) instructed me to pour the glaze on top of the cake when the cake was sitting on top of a rack. Chef Iso said I could then use the leftover run off on a future chocolate project.

So the idea was splendid in theory.

However, how on earth does one transfer the cake from the rack over to the dessert plate?!?

I couldn't figure it out.

So I just let it run off onto the plate.

Because it tasted delicious. And honestly, I wanted to scoop that extra chocolatey goodness onto my spoon and eat it all up. Which I did. Yummm.

Okay, maybe not ALL of the run off.


I mean really. Look how pretty that is!

I didn't freeze my cake, so that's why I ended up with so much run off in the first place, I do believe. And honestly it wasn't all THAT much. 

But in the days of Covid, my freezer is packed to the brim. 
With toilet paper.
And I didn't have any spare room for a cake.

So I did the best I could.

Which, well, I think wasn't half bad.


Ingredients for the mirror glaze:
Thanks to Chef Iso

I cut the recipe down by a LOT because I was only making the one cake. And it still made way too much. Like a gajillion times too much. 
I recommend cutting the recipe down even further.

6 ounces dark chocolate (I used Trader Joe's 70% red chocolate bar)
100 grams water 3.5 ounces water
125 grams sugar
100 grams condensed milk (I actually increased the amount because I liked it sweeter)
1 tablespoon vanilla extract
10 grams powdered gelatin (which I didn't have. I had a small sheet worth -- about 8 ½ by 2 inches or so, which I used instead. I'm in the middle of a pandemic and am unable to go the store to get the right kind of gelatin, so I used what I had. It's called making do. And I made did. And it turned out swell, thankyouverymuch.)
AND 25 grams of cocoa powder

Directions:

  1. In a small bowl, bloom your gelatin in cold water. (For me, I just put my sheet of gelatin into a bowl of cold water. If you're using powder, make a thick slurry as you gradually add in the cold water to the powder.)
  2. Chop up your chocolate into fine bits. Add in your cocoa powder.
  3. In a small saucepan, heat your water, sugar, and condensed milk until it comes to a boil.
  4. Stir in the vanilla and the bloomed gelatin until fully combined.
  5. Pour the hot mixture over the chocolate. Let it sit for 5 minutes or so.
  6. Using an immersion blender, blend the chocolate until it is nice and smooth.
  7. Use a sieve to strain out any chunks (I didn't have any chunks, but ok).
  8. Wait for the chocolate to cool to 90℉. Then slowly pour the glaçage over the top of a cake that is sitting on a rack. If you want that drip down the side look, feel free to pour your glaçage into a drizzle bottle and drizzle it down the sides, and then cover the top of the cake.
  9. Allow the glaçage to cool for about 15 minutes, then transfer your cake in some magical fashion over to a pretty cake plate. Since I'm not Dobby the Elf, and don't have magical powers, I skipped this step, and my pretty cake had a small pool of glaçage at the base of the cake. Alas.
The mirror glaze will not harden like a firm, tempered chocolate, but rather in this lovely "ganache-like gel." It's delicious. And looks lovely. And I can't wait to try the white chocolate version that I plan to use on top of a new recipe I'm concocting. Think back to Christmas with my Bali Biscuit cookies. I'm thinking of a coconut crisp cookie, a small strawberry or pineapple gelée, then a passion fruit mousse, covered in this pretty mirror glaze. My kiddos gave me the little molds for Christmas. I've been too chicken to try out a mirror glaze (how silly of me, it was quite simple!). And now I have to find recipes for mousses, because I've never made a mousse before, and frankly, it's about time! To be honest, I've been terrified of the gelatin bit. Don't know why, exactly, but that's what's been holding me back. Now that I've tried it, and it worked so splendidly, I anticipate many future dessert recipes with gelatin.


Now, I know some of you are wondering about the recipe for the chocolate cake and the delicious chocolate fudge frosting.

Well don't judge me too harshly, but I haven't yet found a recipe for either that I've been satisfied with.

So.

Gasp.

I used a box caked mix and tub o'frosting.

Yep. That's what I did.

Didn't even doctor them up by changing out the oil for butter and the water for milk. Which I have done in the past, and it's delicious that way. Nope, I simply followed the recipe on the box. Then I sliced off the tops and ate them with my fingers. And I used a spoon to scoop out tub o'frosting and slapped that sucker right on up onto the tops of the cakes I lobbed off, and I ate that too.

So there.

Horrors.

I know, I know.

I'm such a good baker. Why on Earth would I stoop to such measures??

Well, we're in a pandemic, folks.


And I'm using the ingredients that I have.

And frankly, I don't care.

It was yummy.

Some day I will find a recipe for chocolate cake and chocolate fudge frosting, and it will be amazing.

Maybe I'll get Mary Berry's cake book for my birthday or something.

Maybe my Julia Child cookbook has a chocolate cake recipe in it. I'm too chicken to use her cookbook too.

What is it with me and being a chicken?!?

Alas.

But for now, that's what I had in the cupboard, and that's what I used.

Baking and cooking have kept my mind off the world's problems with the pandemic going on, and my family's tummies are happy. We're all safe here at home and are counting our blessings. It's a tough thing for us having a first responder in the family. The hubster is working his katookus off so that we can be safe, and we're so grateful for his sacrifice! Thanks honey! 

Have another piece of cake.

Here's to more chocolate cake, more loaves of bread, delicious soups, and comfort food all around.

Stay safe out there.


* * * * *

I not only bake and cook, I write murder mysteries too!

Both books are available in paperback and kindle versions

Diamonds for Diamond 
(Book 1 in the Jack Diamond Mystery series)
and
No One Noticed
(Book 2 in the Jack Diamond Mystery Series)


* * * * *

Monday, April 6, 2020

Granini's Gnocchi and veggies in cream sauce

Granini's Gnocchi in Cream Sauce

Here is part 3 of the trifecta of today's blog entries!

Granini's Gnocchi in Cream Sauce
Once the gnocchi is made, the whole thing just takes a few minutes to throw together. So if you have extra gnocchi in your freezer, you can simply plop them onto the counter, thaw them while you're prepping your veg and making your sauce (or pop them into the microwave for a wee bit), and just make sure you cook them long enough to heat them all the way through! Fast and easy dinner.

(And frankly, the gnocchi isn't complicated, difficult, or terribly time consuming to make from scratch by any means -- it just SEEMS like it is, because its name is all fancy.)

Ingredients

Gnocchi:
Leftover mashed potatoes (about 2 ½ cups)
 2 1/2 cups flour
1 egg

Veggies:
2 cloves of garlic, minced
2 tablespoons (approx) olive oil
olive oil spray
parmesan
9 stalks of roasted asparagus (see below)
1 onion, diced
1 red pepper, diced
½ jar (4 ounces or so) sun dried tomatoes (Trader Joe's has a great jar of these), drained and chopped
1 cup fresh spinach, chopped
Trader Joe's Julienne Sliced Sun Dried Tomatoes: Amazon.com ...
Pretty much anything you can acquire at Trader Joe's is amazing. I know that sun dried tomatoes went out of style back in the 90s. However, I still love and adore them, and every so often, I incorporate them into my meals because I just can't help it. I ♥︎ me some Trader Joe's!!

Cream Sauce:
2 Tablespoons butter (I used salted)
2 Tablespoons flour
2 cups half & half
1 sprinkle (about 1/8 of ¼ a teaspoon) of kashmiri pepper (optional)
salt & pepper to taste


This pepper is my new current and most favorite spice I currently have in my cupboard. It has all the lovely flavor of chili, but very little of the heat. I struggle with spicy foods. I love the flavor, but the heat of the chilis burns my tongue in such a way that I cannot enjoy it.
My friend Hiro who owns a lovely Indian restaurant in Manila introduced Kashmiri pepper to me back in October. My many thanks go to him for introducing me to Kashmiri pepper, as well as to the wonders of butter chicken with roti, and chicken tikka with a cilantro/mint chutney. Oh my! that sweet, sweet goodness is just about the bomb diggity of all deliciousness. Hopefully next week I'll be able to acquire both cilantro and mint so I can try to replicate his unbelievably delicious meal!! Meanwhile, back to gnocchi...


Directions

  1. Heat the oven to 375℉
  2. Spray a jelly roll pan (a cookie sheet with sides) with olive oil spray. Wash your asparagus and pat dry. Place the asparagus onto the olive oil covered jelly roll pan. Spray the asparagus lightly with olive oil spray. Sprinkle withe parmesan. Bake for 8 minutes. Cut the asparagus into ½ inch (or so) pieces.
  3. Make gnocchi. I have a pretty good step-by-step set of instructions if you're in need. Just click on the link here.
  4. In a large saucepan, heat up olive oil and toss in chopped onions and peppers. Once everything is soft, add in your sun dried tomatoes. Then add in the butter and allow to melt.
  5. Add in your kashmiri pepper, and a sprinkle of salt & pepper.
  6. Sprinkle the flour over the entire mixture and stir to create a paste of sorts. Cook for several minutes on low heat, stirring frequently.
  7. If you're feeling the need, you can heat up your half & half by pouring it into a small saucepan, and allowing it to slowly heat up. I am a lazy cook, so I just pour my cream in very slowly into my not-too-hot sauce. If your mixture is too warm or on too high of a heat, you risk curdling the sauce by not heating up the half & half before hand. I find that if I have my mixture on low heat, and if I just slowly add in the cream until it's all incorporated, and then I raise the heat of the pan, I can avoid the curdle without having to heat up my cream ahead of time. But like I said, I'm a lazy cook. So at this point, it's time to add in your half and half, a little tiny bit at a time, until it is all incorporated.
  8. Add in your asparagus and the chopped up spinach.
  9. Taste your sauce and add a wee bit more salt and pepper if needed.
  10. Right before serving, plop in your gnocchi, stir, and serve! I added in 2 cups of gnocchi (about), and the whole mixture served four people very ample servings.
For those of you who like pictures, here you go!


 Stirring in the spinach.

Stirring in the gnocchi

 Trust me on this one, it tastes DELISH!! I only wish smell-o-vision was a thing!


* * * * *

I not only bake and cook, I write murder mysteries too!

Both books are available in paperback and kindle versions

Diamonds for Diamond 
(Book 1 in the Jack Diamond Mystery series)
and
No One Noticed
(Book 2 in the Jack Diamond Mystery Series)


* * * * *

Granini's Gnocchi


Granini's Gnocchi

(It's a terrible picture. Please don't judge. They're DELICIOUS, I swear!)


Hello all!

Today you're getting a three-fer! Whoot whoot!

Three recipes uploaded to my blog on the same day.

Why this super awesome bonus splurge of good fortune?!?

Because first of all, I wanted to send some good cheer during this time of the pandemic. Anything to keep your mind off the horrible things going on in the world is a good thing. 

Secondly, I made my most fav dish of late, gnocchi with veggies and cream sauce a couple nights ago and it was DELISH. And the only way to make gnocchi is to start with a really great batch of mashed potatoes. SO, I thought I'd give you recipes for all three dishes at once: mashed potatoes, gnocchi, and my gnocchi with veggies in cream sauce.

So there you have it, my blessings to you.

May your kitchen emit forth delicious aromas as a lovely distraction.

Please stay safe out there!!

Ingredients

2 ½ cups mashed potatoes
2 ½ cups flour
1 egg


*Here's the thing: you don't have to use 2 1/2 cups. If you don't have 2 ½ cups, don't use that much. It just needs to be equal parts mashed potatoes and flour. The egg just binds it all together. So if you have about half the amount, simply crack your egg into a bowl, whisk it vigorously, and then only pour about ½ the egg mixture into your gnocchi batter. I promise, it'll work AND be delicious.
Directions
  1. Fill a large pot with hot water. Add a sprinkle of salt and bring to a boil.
  2. Sprinkle some of the flour onto a clean surface area. Plop on your pile of mashed potatoes. Pour the flour on the top of the potatoes.
  3. Knead the pile a little bit, and then make a crater in the center and crack your egg into there.
  4. Knead the whole mess around until it feels roughly like bread dough.
  5. Lightly sprinkle with flour on the top.
  6. Cut your dough into 5 or 6 chunks. They don't have to be even. Just chunks that will be easy enough to work with.
  7. With each chunk, roll out the potato dough into a long tube shape.
  8. Now, here's the dealio. My friend Judy, who happens to be Italian, and whose family taught her how to make gnocchi, so I believe she's a pretty darned good resource, taught me this detailed technique on how to roll the balls of gnocchi off your fork to make this pretty pattern. The pattern enables the sauce to stick to the gnocchi and fill all the little crevices. But I forgot. And I was in a hurry. And I was hungry, so I didn't want to try to figure it out. And Judy was in California and couldn't show me again. So when Judy gets back from California, I'll ask her to show me again, and I'll post detailed instructions on how to do that. But until then, I cheated and just used my dough scraper like this one:
to cut my dough into small, bite sized pieces. And it worked out pretty darned well, even if I do say so myself. At least, for a quick and easy way to cheat my way through.

Once all your little gnocchi pieces are cut and ready to go, it's time to cook them.
  1. Get yourself a drying rack (I use my cookie racks) ready with a drying towel underneath to sop up all the water that will drip off your gnocchi. In your boiling pot of water (with a wee bit of salt added), add about 8 gnocchi at a time to the water. Have a slotted spoon or a scooper ready to go, because they're only going to cook for 2 minutes or so.
  2. Once your gnocchi pop up to the surface, scoop them out and plop them down onto your drying rack. If they don't pop up after 3 minutes, feel free to stir your water around a little bit, and they'll float right on up to the top. After several batches, the water will become murkier, and waiting for the gnocchi to surface is a bit like watching a ghost appear out of a horror film. Terrifying, yet satisfying. The gnocchi appearances that is, not the appearances of the ghosts. Ghost appearances are always terrifying. To me. At least.
I use a scooper like this one:
It's the same scooper I use to get my fried chicken out of my oil when I'm making General Tso's chicken or chicken tenders.
  1. Once all your gnocchi are cooked and are sitting on the rack, you're all set to make your veggies and cream sauce. If there are any leftover gnocchi, which for me, there always are, you can pop them into a zip lock bag and freeze them, and they'll be ready to plop into your future soupy goodness later on.
  2. Gnocchi can be used as a substitute for any pasta sauces you love and adore. So feel free to make my gnocchi with veggies & cream sauce, or toss some of my spaghetti sauce on them. Or maybe pesto. Or into my tomato and pepper soup. Or add them into your beef stew. 
Serve them up however you like!
Enjoy!!

For those of you who like pictures, here you go!

Plop your egg right in the middle of the pile o'goo

 Knead the mixture until it looks a bit like bread dough and the flour is all encorporated.

 Sprinkle the top with a little more flour
 
  Cut into chunks

DO NOT ADD MORE FLOUR AT THIS POINT... SEE BELOW...

*Do NOT sprinkle with even MORE flour like I did here. I was tempted, thinking it would be easier to roll out. But the extra flour made it SOOOO much harder to roll out the piece.

*Here is my very lopsided, very uneven, very hard to roll piece that I had added more flour to. The rest of my gnocchi rolls were easier to roll out without the extra flour.


Here are the rest of my gnocchi rolls. Much easier to roll out without extra flour. They didn't stick to the counter like I thought they would, and they rolled out more evenly. Next time I would roll them out even thinner.

Once your rolls are all rolled out, it's time to invoke the special 'rolling off the fork technique' that I learned from Judy. But I forgot out how to do that. So I just did it the simpler way and chopped them up with my dough scraper.

This way was simpler, but it won't allow the sauce to stick to the pretty little crevices. Alas.

Just another camera angle so you can see I'm cutting them up at an angle. 

The gnocchi sink when you first plunk them into the water. As soon as they begin to rise (like these four did), you can scoop them out of the water. It only takes a minute or two for them to cook.

My lovely cooked gnocchi, ready to plunk into cream sauce. Or spaghetti sauce. Or pesto. Or whatever your heart's desire!!!

This is my favorite way to serve the gnocchi:

 Granini's Gnocchi with veggies in cream sauce

Enjoy!!


* * * * *

I not only bake and cook, I write murder mysteries too!

Both books are available in paperback and kindle versions

Diamonds for Diamond 
(Book 1 in the Jack Diamond Mystery series)
and
No One Noticed
(Book 2 in the Jack Diamond Mystery Series)


* * * * *