Monday, August 25, 2014

Kitchen Remodel: Materials Used


Here are the materials we used for the kitchen:

We bought our faucets and kitchen sink from George Morlan Plumbing

Oil Rubbed Bronze Kitchen Faucet
Kohler Bellera K-560-287


Insinkerator Instant Hot Water Heater F1000S


Insinkerator Instant Hot Water Heater Oil Rubbed Bronze Faucet F-GN1100


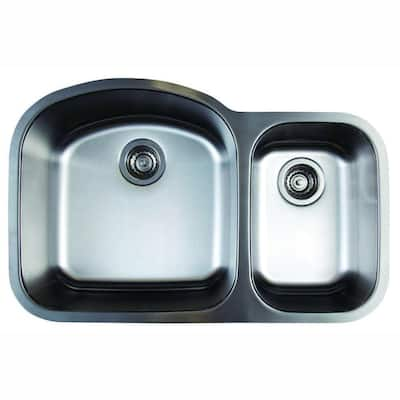
Stainless Steel Sink
Blanco Stellar 1.6 Stainless Steel Kitchen Sink 441022

Backsplash
Let me just take a moment to say WOW and THANK YOU to my two amazing tile guys.  It took two, expert tile guys, two ENTIRE days JUST TO TILE, and one extra day just to do the grout.  The mini 1x1 bronze tiles only required one cut, but each of the 2x2 tiles required two cuts each.  And the pattern created a bit of a time consuming, detail oriented challenge.  But the results were amazing.  Such beautiful artwork!!


Here is an up close view, before grouting, of the backsplash

So, now on to the materials we used for the kitchen:

Rug (pretty design over the oven, under the hood)


Outside trim (picture frame): Questech Oil Rubbed Bronze Braided Rope Ogee 3x12


Creamy colored inner row: Salerno Nubi Bianche Floral Accent Strip 3x10
Link to the floral accent strip through Daltile's website


Westminster Cast Metal Half Round Rope Copper 1/2 x 6


Emperador Light Marble 4x4
(My fabulous tile guys cut the 6x6 downs to 4x4s, then sliced them at a diagonal.  They rock.)
Link to Emperador Light Marble

Questech Oil Rubbed Bronze 4x4


Copper 4x4 picture frame

Copper 2x2 scudo


Backsplash (other than rug):

Emperador Light Marble 6x6
Link to Emperador Light Marble


Questech Oil Rubbed Bronze rope 1x12


Westminster Copper 2x2 scudo
Questech Oil Rubbed Bronze Fleur Dot 2x2


Bronze 1x1


Outlet covers:

Allen & Roth Oil Rubbed Bronze from Lowe's
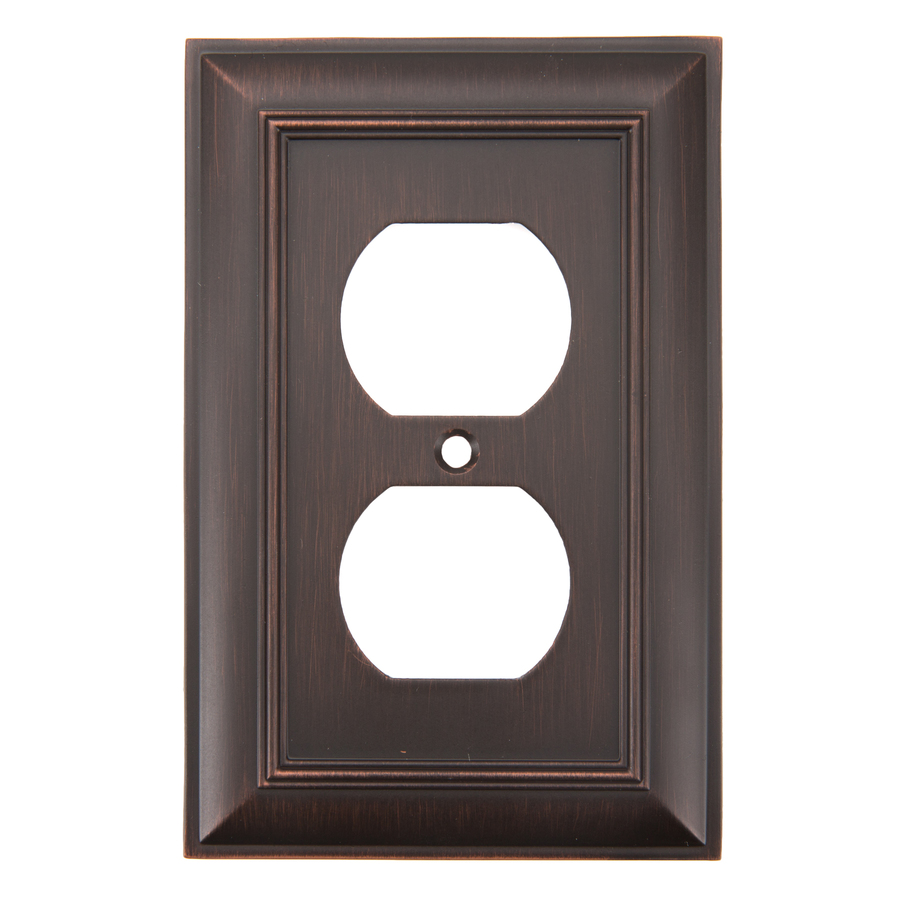
Lowe's link to the outlet cover

Grout
We had to use 2 different colors of grout for our kitchen tile.  The first was Fusion Pro Charcoal (for all the oil rubbed bronze tiles) and the main one was Fusion Pro Light Smoke.  We have TONS left over.


Here you can see the light smoke grout.  So pretty.  Who knew?


Here you can see where they taped off the lighter areas to grout with the charcoal grout color
Super awesome Justin, my grout guy.


The cabinets
The cabinets we bought from Crestwood Cabinets in Washington state.  They are cherry cabinets with solid wood interiors, and have a Cherry Cordovan stain on the front.

The granite
We bought two granite slabs called "Typhoon Bordeaux," 3cm, from Brazil.


The Lights
We picked our recessed LED can lights from Lowes.  We bought them in 2 packs, then had SO much light at the end of the project we had to hire the electrician to come back and insert a dimmer switch.  


* * * * *


House Renovations - Before and Afters

House Renovations - Before and Afters

Our house renovations are complete!!

Well, almost complete.  There are a few *very minor* paint touch ups to do.  And then there are the four closet doors that I had removed from the kids' bedrooms and stored in the garage that I need to sand, stain, and varnish.  We'll never use them, but when we go to sell the house in 20 years, I'm sure they'll want doors that match the rest of the house.  And then there's the outside door to the garage to sand and prep for painting.  That sweet hubby of mine threw me under the bus on that one.  The painter complained that it would take a LONG time to prep the door to paint, and would cost a LOT of money to do so.  Since I've done all the rest of the doors in the house, and it didn't take TOO much time or effort, my hubby offered up my services in hopes of saving us a few bucks.  Yay me. 

SO!  The moment you've all been waiting for!!!

I have spent the better part of the morning playing around with my computer and making before/after photos of the house renovations.  I LOVED going through all the really old photos from when we first moved in and "tried" to make changes from the original house owner's decorating ideas to create our own.  Some of our changes were okay.  Others, not so much.  I hope you have as much fun looking through them as I did!


Saturday, August 23, 2014

Give your characters flaws


Making the Perfect Pie Crust -- Admitting Your Faults
Giving Your Characters Flaws

Whilst roaming about on Pinterest this morning, getting my morning creative juices flowing, I came across an interesting article regarding not making your characters too flawless.  The article referred to a different type of writing than I write, but the gist of the article rang true. If you can't relate to your main characters, if they seem too handsome, too perfect, can they really be relatable?

Once, about three hundred million years ago when I was an adjunct college professor, I lectured my students about the difference between Martha Stewart and Oprah Winfrey.  Martha, at the time -- during her pre-felon stage, presented herself as too good to be true.  She had the perfect recipe for chocolate tortes, she could whip up a Christmas wreath using nothing but the scraps from her cupboards, and she could set a table like no one's business.  But not once, in all the magazine articles I scanned, or online articles I reviewed, did I EVER hear Martha mention that she struggled with a certain arts/crafts activity.  From what I can remember, she never said that her recipe for pie crust sucked.  She never once admitted that she hated threading needles because her vision was crapping out on her.  She never admitted that someone else that she knew could do it better than she could.  She presented herself as flawless.  And instead of being inspired, I grew jealous (ugh!), and despised her.  And, I think, so did many other people.

Oprah, however, put it all out there.  She admitted that she had a weight problem.  She admitted to her abusive childhood and her baby she had at age 14.  She offered up example after example of her daily struggles.  She laughed (and cried) at herself and her struggles and her audience, well, they laughed (and cried) right along with her.  She made herself REAL.  She made herself relatable.  We loved her because we suffered right along with her.

So, when we're writing, what kind of characters do we want to have?  Characters that we can all relate to?  Or characters whom we all despise?  

I want everyone to fall in love with my main character.  I already have.  I know his inner struggles.  I ache for his horrific past.  I yearn for love to make its way to his heart.  I know about his soft spot for his grandmother. But maybe I haven't put enough into my manuscript to make those flaws visible to the reader.  Do they see his flaws?  Do they know what makes him human?

So when you're writing, think about your characters.  Do they have any flaws?  Are they coffee junkies?  Do they suffer from an aggressive streak?  Do they bite their fingernails or drive too fast?  What is it that they do that you can relate to?  Because if you can make your characters relatable and realistic, we will love them all the more for it.

Perhaps it's time to show them that you suck at making pie crusts, but your Auntie Kay?  She sure can whip up a crispy, flaky crust that will make your mouth salivate just looking at it.

 * * * * *